Donations towards server fund so far this month.

 
£0.00 / £100.00 per month
Page:
Home > Show Us Yours! > Turbo Cooper - floor repairs

PhilR

User Avatar

696 Posts
Member #: 10034
Post Whore

Birmingham

Just taking the first steps on what will hopefully turn into a turbo project *happy*

I've been running megasquirt2 for a month or two and took the cooper out last week end to do some testing, but ended up with a bit of a drama and getting towed off the M42 *oh well*


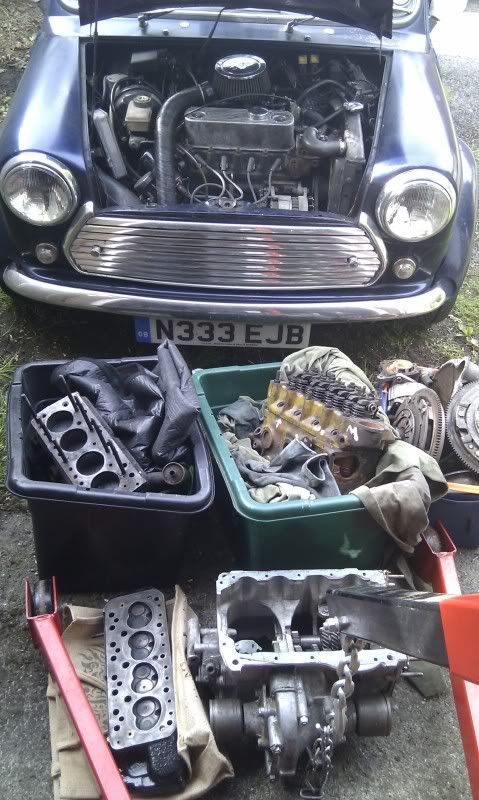
I've gathered as many bits as I can find and pulled the SPI engine this evening. The plan is to work out what's practical to get a turbo engine working in 8 weeks.


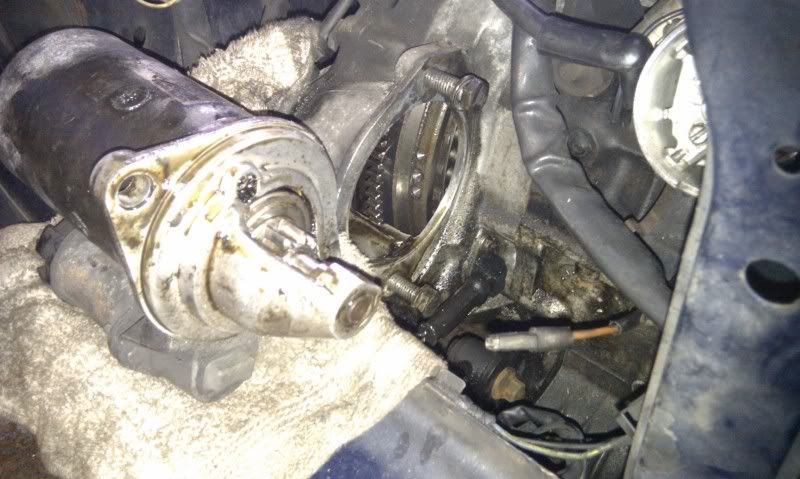
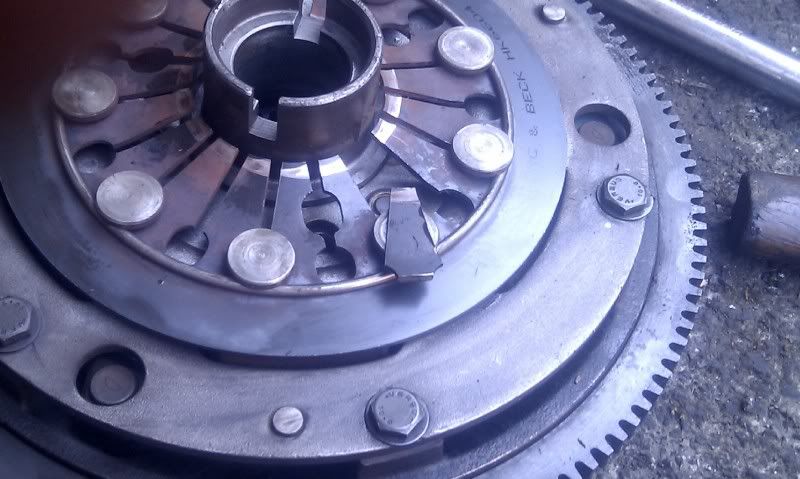
Flywheel and starter soaked with oil. Along with an oil light that stays on under 2000 rpm and a lot of rumbling when running... this isn't looking good for the 1275 block.


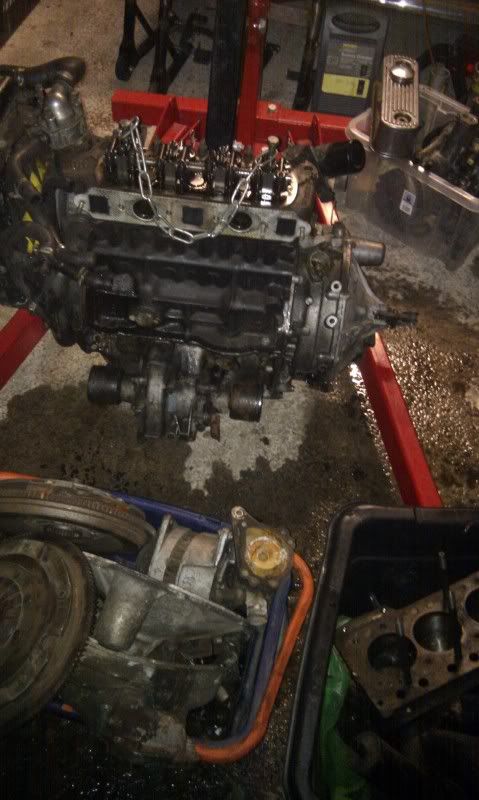
Engine out, it's getting late, and I'm tired, so the autopsy continues tomorrow!

Edited by PhilR on 2nd Feb, 2016.


Chalkie

1909 Posts
Member #: 9764
Post Whore

Northamptonshire.

Wow got a few parts and good luck with the 8 week deadline you are brave!! http://turbo-mini.com/62147.html did that in 24 hours :)

and loving the number plate is that personal?


nala56

User Avatar

825 Posts
Member #: 9661
Post Whore

Sheffield South Yorkshire GB.

If you have the money, I think your dead line can be achieved easy, nice mini..

Main Build
http://www.turbominis.co.uk/forums/index.php?p=vt&tid=489133

Upgrade to Turbo
http://www.turbominis.co.uk/forums/index.p...tid=448367&fr=0


BENROSS

User Avatar

9812 Posts
Member #: 332
Resident Cylinder Head Modifier

Mitsi Evo 7, 911, Cossie. & all the chavs ...... won no problem

You will sort it if you have the time? Money and sheer persistence! Give me a shout if you need help


PhilR

User Avatar

696 Posts
Member #: 10034
Post Whore

Birmingham


On 22nd Jul, 2012 RidingLow said:
Wow got a few parts and good luck with the 8 week deadline you are brave!! http://turbo-mini.com/62147.html did that in 24 hours :)

and loving the number plate is that personal?

Cheers. I'm generally not a fan of personalised plates, but this was rock bottom price on DVLA, and I knew it would be appreciated by mini fans.

On 22nd Jul, 2012 nala56 said:
If you have the money, I think your dead line can be achieved easy, nice mini..

The budget is what ever the credit-card can take!! I was horrified by the cost the (first time the) diff self-destructed and I had to rebuild the whole engine. I know that this rebuild will not be cheap, but if it needs a lot of engine work, I might as get the turbo in there while I'm at it?

On 22nd Jul, 2012 BENROSS said:
You will sort it if you have the time? Money and sheer persistence! Give me a shout if you need help

Thanks BENROSS. I'm never the first to ask for help so please jump in if you see me making a complete mess. I've no practical experience with turbos, so all wise words appreciated *smiley*

Edited by PhilR on 23rd Jul, 2012.


PhilR

User Avatar

696 Posts
Member #: 10034
Post Whore

Birmingham

Whoops.


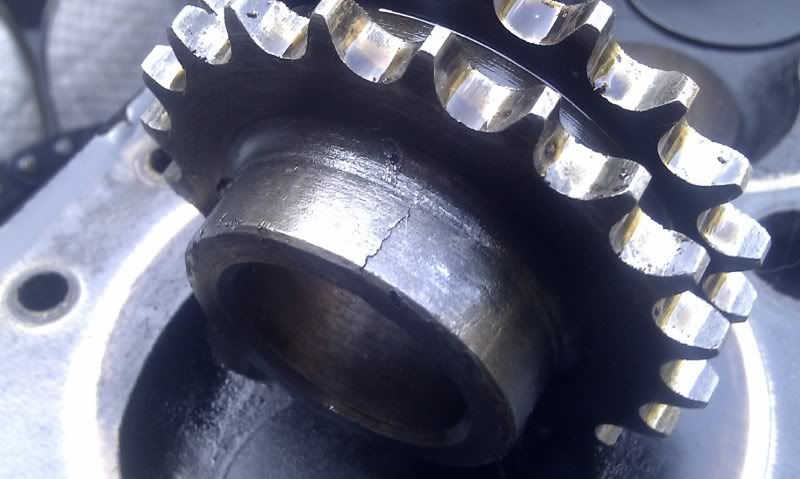
This timing gear was always a tight fit.I Just though it was a pain until I saw this crack. Maybe I should have looked into it earlier.


The 1st motion bearing is dead. Half of the yellow plastic bearing housing came out in the old oil.


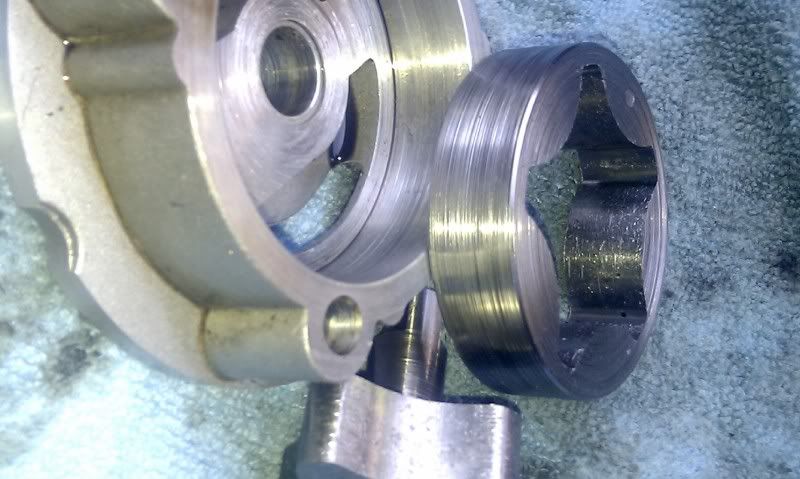
This is the worst oil pump I've ever seen. The scores and groves are incredable


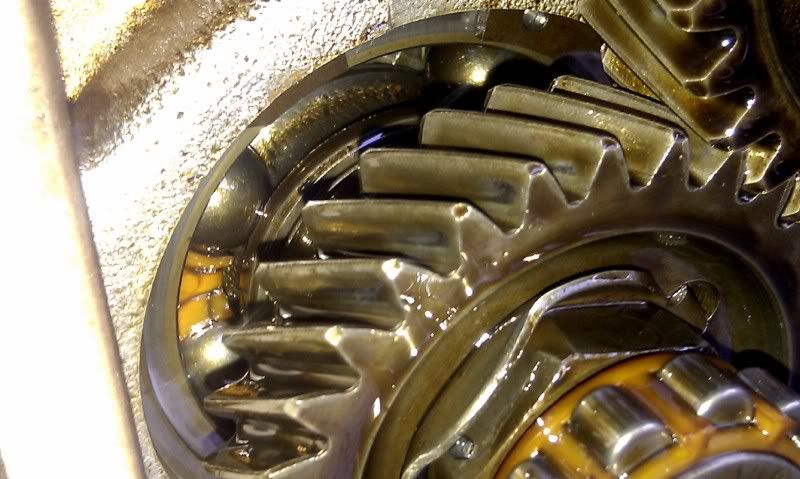
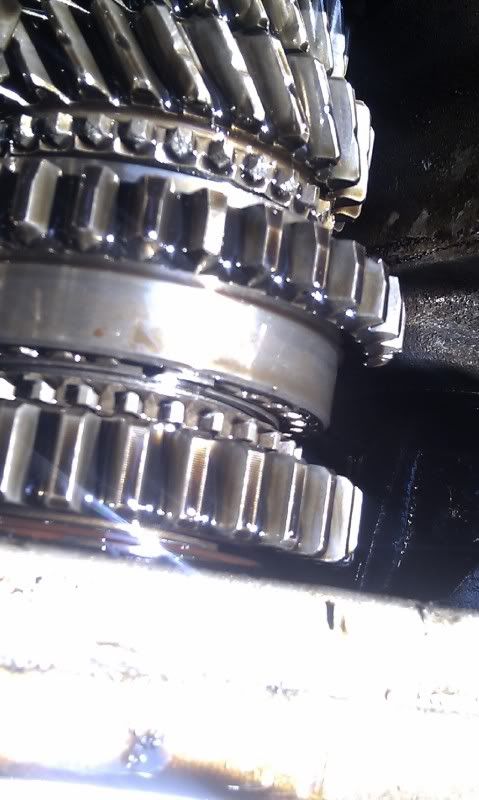
1st gear is 'ok'. 2nd gear dog teeth are destroyed. This box will be put aside for a rebuild, but I have a healthy rebuilt gearbox to transplant in.


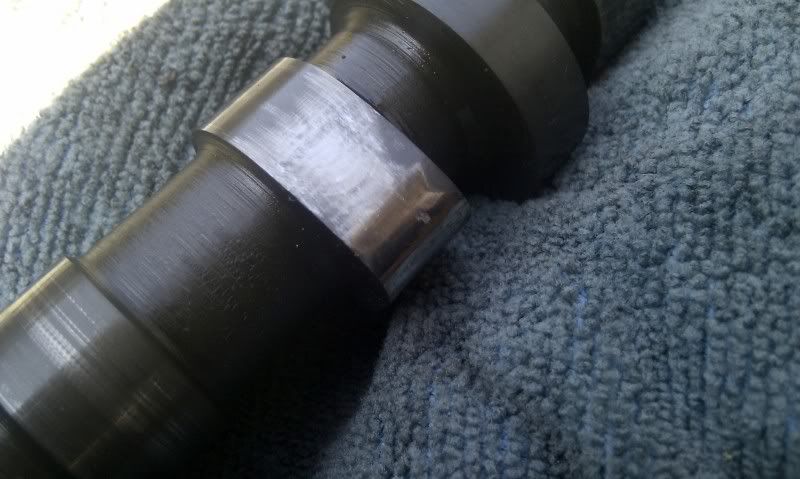
Piper BP270i Camshaft has one single pit mark on one lobe, but apart from that seems fine. Should I keep, or take the chance to swap it out for a more proven cam?


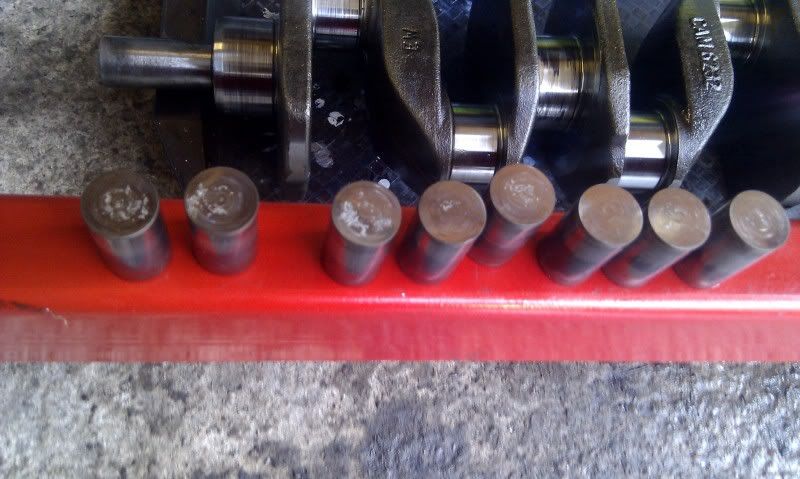
Followers - scrap


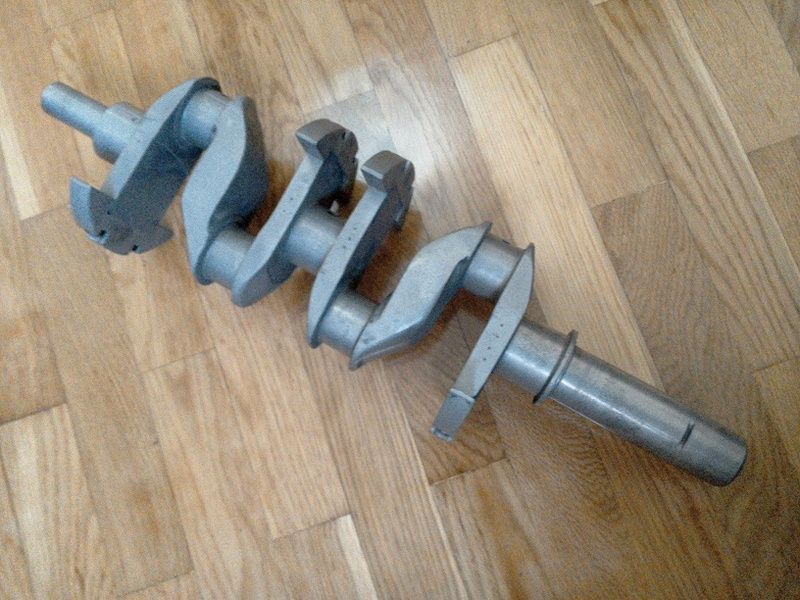
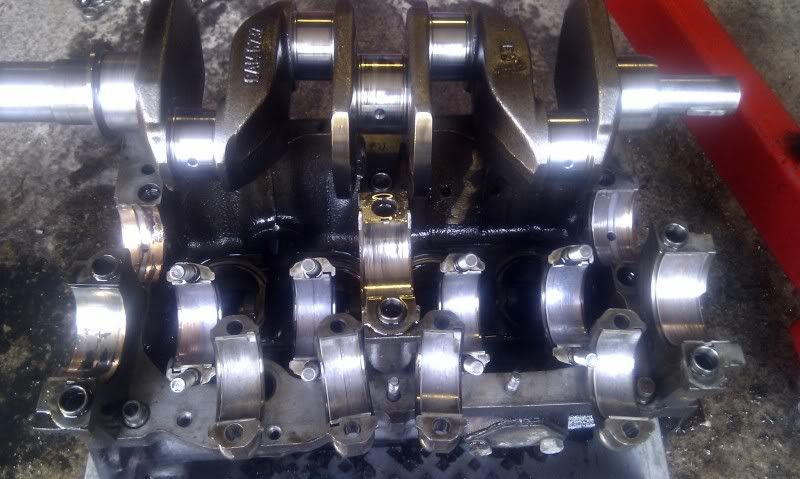
Crank - Mains don't look healthy - the one on the nearest the flywheel (left of pic) has disintegrated completely - most of it was in the sump. Big ends don't look anywhere near as bad. No.4 has worn through on one side, but not sure if that's me fitting it badly, or down to the main bearing problem


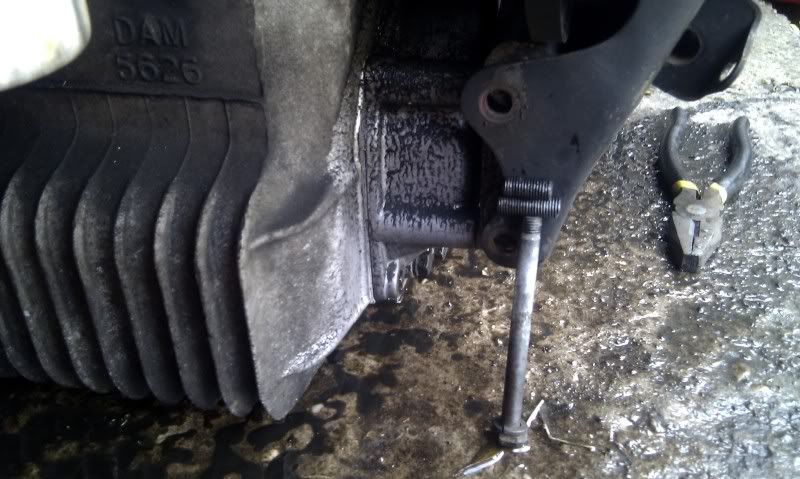
Left engine mount - both long bolts below the radiator have sheared (too tight?). Luckily one was left stuck in there supporting the engine,


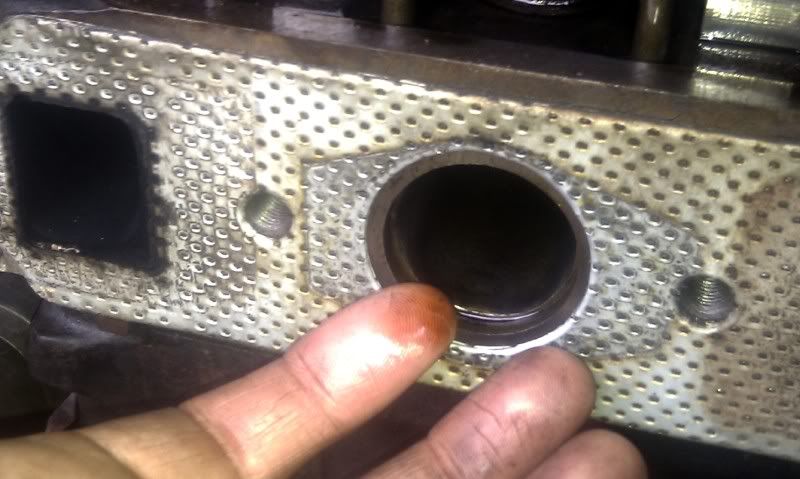
Cylinder head. VERY oily in the inlets. Exhausts are dry, gasket face is dry (oil didn't drip in while rocker cover was off). I'm a bit confused by this, so I still need to strip the head and check it over.


... And that's about it for problems. I think I've seen the worst of it now, so now, the only way is up. Both 1275 and 998 engines are candidates, so I'll check out the bottom end of the 998, then start drawing up a plan.


Edited by PhilR on 23rd Jul, 2012.


PhilR

User Avatar

696 Posts
Member #: 10034
Post Whore

Birmingham

3 weeks in, and some progress!

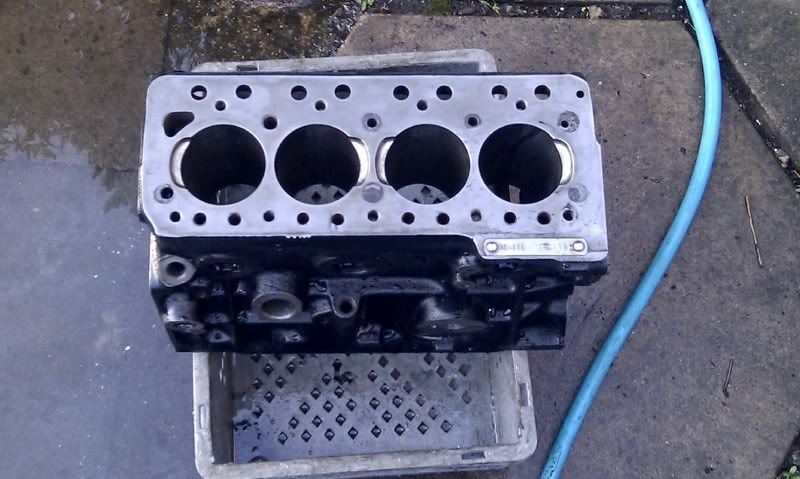
One of the 998 engines I had was in much much better condition that the 95k miles 1275 that I took out; It just needed a coat of paint. The large bore would need an overbore, pistons, all bearings, crank regrind on all journals, to get it to the same condition as the 998. It will be revived, just not yet as I'm on a super frugal budget.

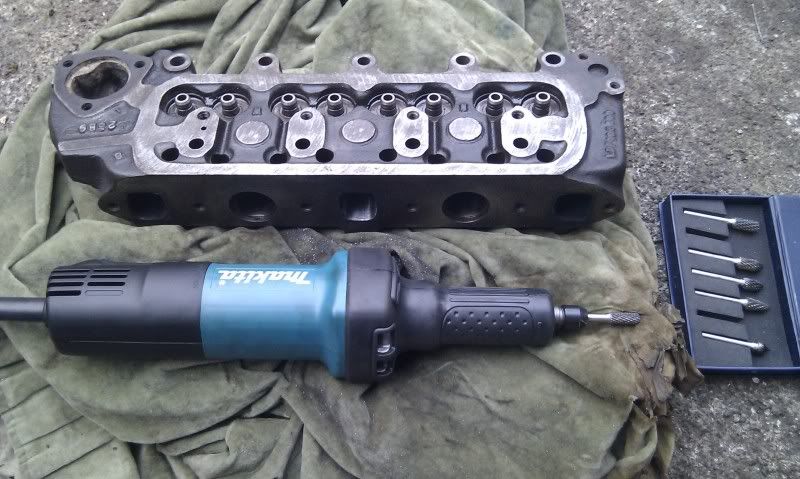
Tools don't count towards the budget though so bought this *smiley*


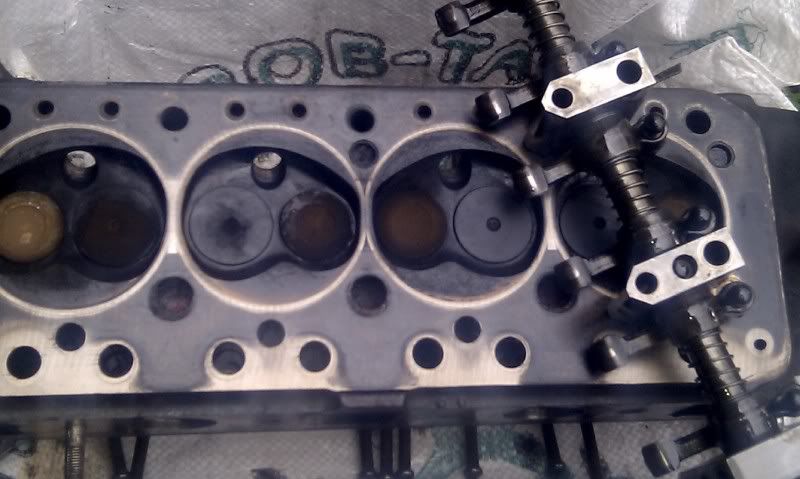
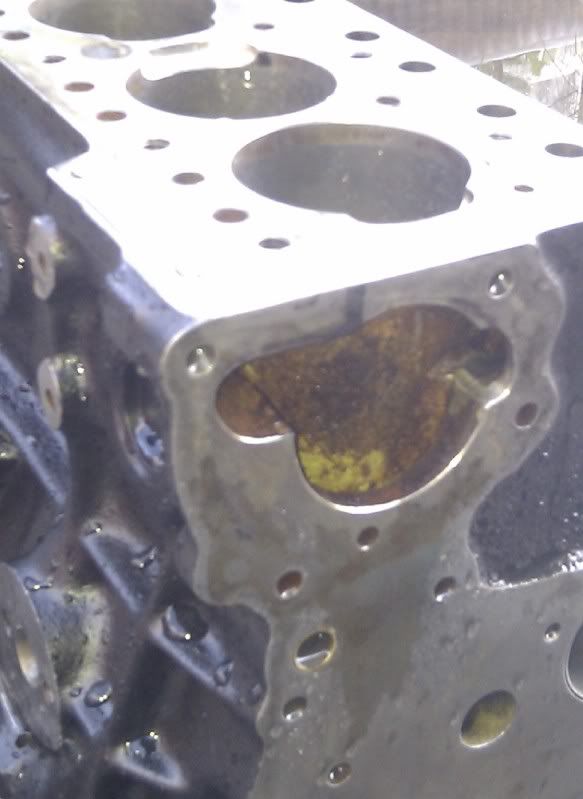
... and got straight to work. I've pocketed the block to match the head chambers. I've only roughly worked out how many cc I need to lose to get the CR down - I still need to match the volumes of the pockets, and hopefully I shouldn't need to take much more out of the head.


I'd like to do a (sort of) dry deck. I don't want to spend any money though, so I'm going to try and do it a different way. I've taken the die grinder to the water way behind cylinder 4. If the cross section is at least as large as the narrowest part of the system (pump inlet ?) it should be fine to plug all the other passages.

I've tried to encourage more water around the back of the block by grinding a little from the water pump hole. Credit to <<someone>> for this idea (I'll edit this when I find the original post)


Craigie-B

User Avatar

1492 Posts
Member #: 9468
Post Whore

Wootton Bassett

nice :)

On 10th Mar, 2012 theoneeyedlizard said:

Hypothetically speaking, where would you stick your nozzle?


On 22nd Jun, 2012 apbellamy said:
my wife doesn't know what.head is never mind compression ratio.


Chalkie

1909 Posts
Member #: 9764
Post Whore

Northamptonshire.

Looking good dude! and the mods to the block look good wonder if they will help or not? let us know :)


PhilR

User Avatar

696 Posts
Member #: 10034
Post Whore

Birmingham

I've spent a long time away from this so an update is long overdue!


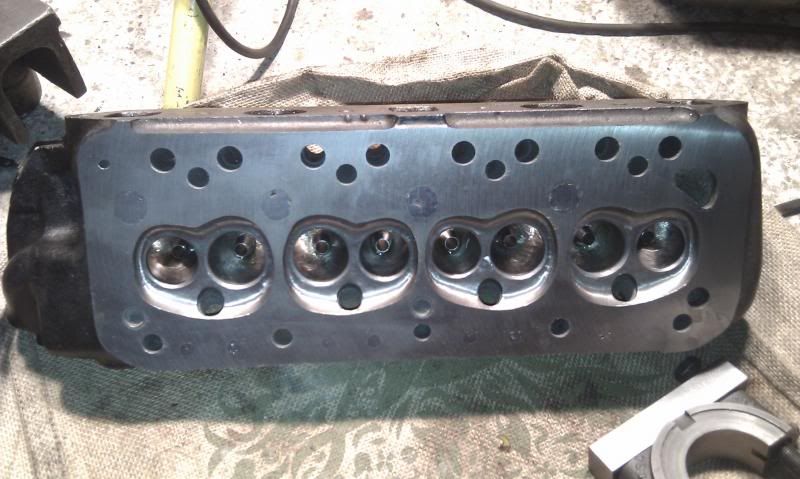
I've made a few changes to the head; I've tidied up the chambers a little, bullet-ed the valve stems and reworked that area of the throat / port. I've also 'rimflow'-ed the valves while they where out. I have no real reason to think that will make any difference but I'm fairly confident it'll do no harm.

Most of the waterway holes in the head have been welded up, and the last 2 holes furthest from the water pump opened up to encourage better cooling. I was trying to emulate a dry deck set up without any extra hardware or machining costs.


PhilR

User Avatar

696 Posts
Member #: 10034
Post Whore

Birmingham

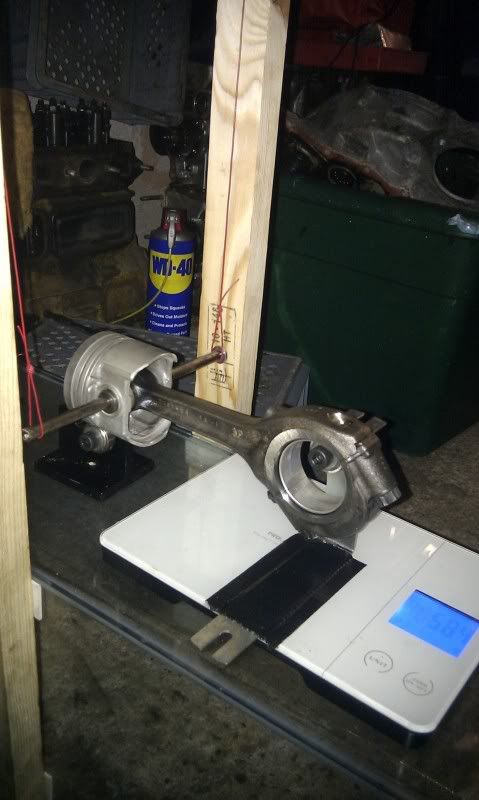
I made a crude setup to balance the rods. I could repeatable measure a difference of up to 10g between the big ends, so corrected them until there was closer to 1g difference


There's nothing more I could do without removing the pistons so left it at that.


PhilR

User Avatar

696 Posts
Member #: 10034
Post Whore

Birmingham

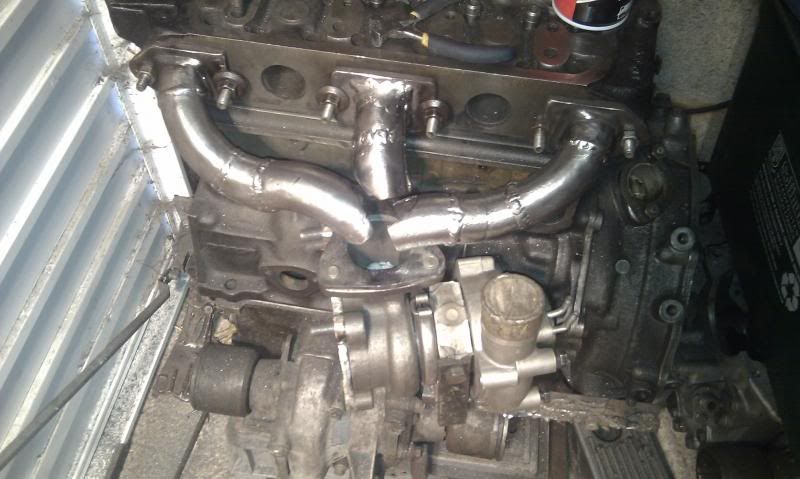
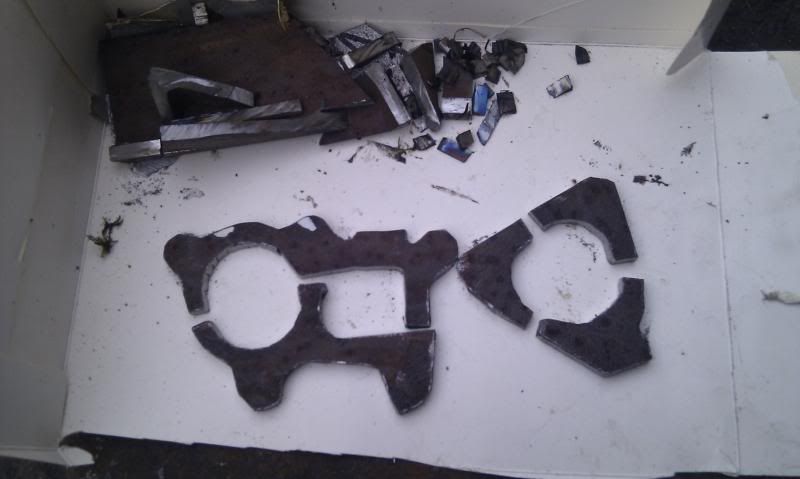
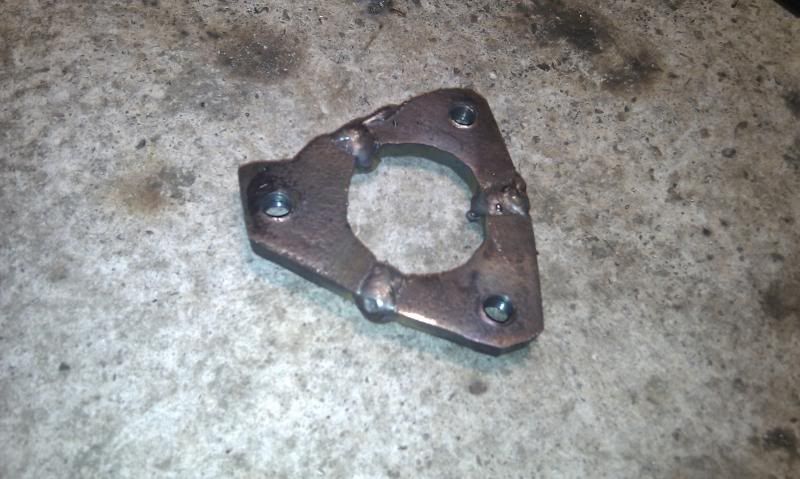
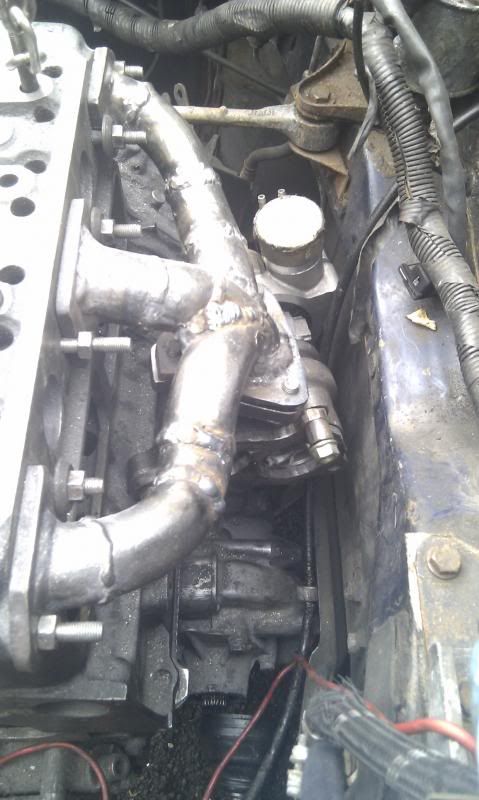
This is the first attempt at fabricating the exhaust manifold. I couldn't find any pre-cut flanges for my turbo so made my own. I made a cardboard template, cut out flange sections from 7mm thick angle iron, them welded them together

The rest of the manifold was made from sections of a cut up LCB. The welding is sinfully ugly but I'm sure it will hold for now. Since finishing it, I've modified my rubbish SIP MIG welder so that it actually works, and later bought a TIG machine. I'm resisting redoing the manifold although I know it's shameful; I really have so much to do before winter so it will have to do for now.

I'm intending to finish the down-pipe in 2" stainless but need more practice with the TIG first.


I haven't got a picture of the final tided flanges but I'm more than happy they're up to the task (and they cost nothing *smiley* )

Edited by PhilR on 9th Sep, 2013.


PhilR

User Avatar

696 Posts
Member #: 10034
Post Whore

Birmingham

Inlet mods...

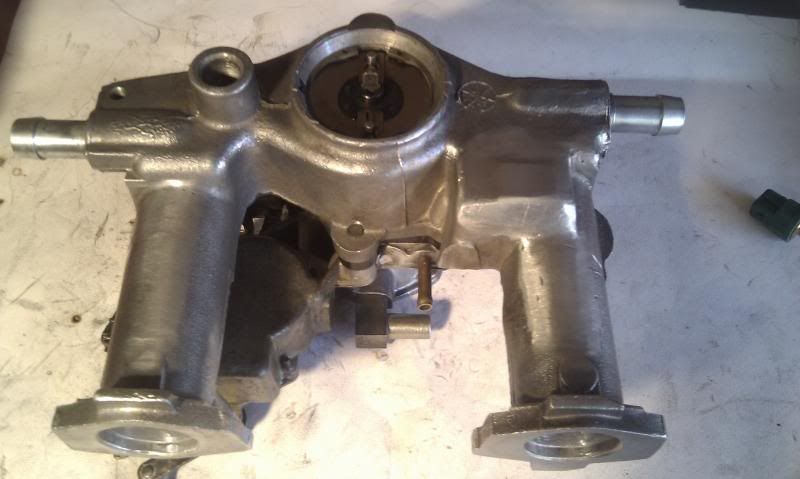
Keeping with the 'not spending any money' theme I've modded the SPI inlet manifold for now.

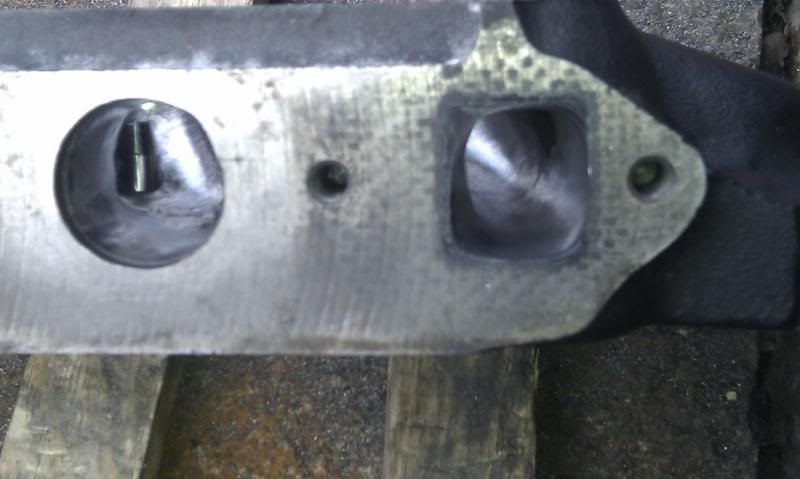
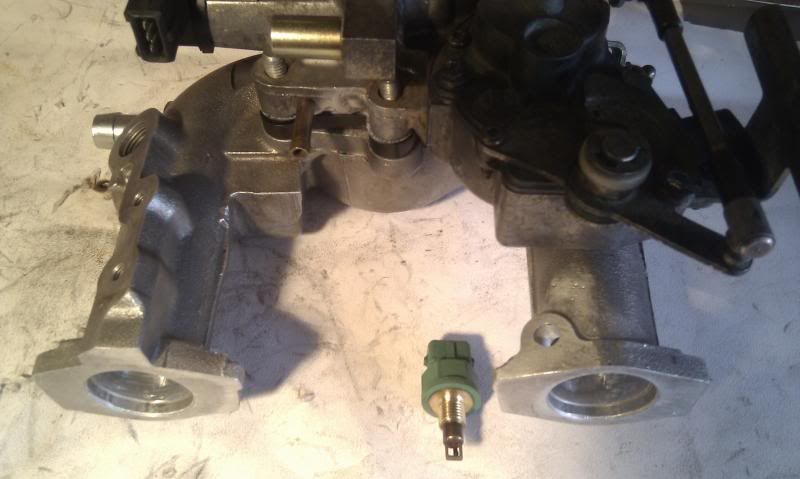
Mainly, I've moved one of the water take offs to the opposite side as it fowled the exhaust, and welded up the hole it left behind. I've also deleted the restrictions that were cast into the ports and tidied up some other areas in the ports. I couldn't find a lot of guidance on what works so this was a little guesswork and a single post that Sprocket said he'd also removed the same restrictions, was good enough for me. Ideally, I want to remake the manifolds next year, so this will be just fine for now.


I also needed a new place to put the air temp sensor as the old position was in the old air filter housing. I've added a little metal close to where the port meets the head and drilled and tapped a new hole. Hopefully, being further down stream, it should give the most accurate temp reading, as the previous position can't take account of any heat added at the manifold, e.g. heat soak from the exhaust. I had problems when trying to tune MS2 previously, where the tune would "drift" throughout each run, so hopefully this should help.


PhilR

User Avatar

696 Posts
Member #: 10034
Post Whore

Birmingham

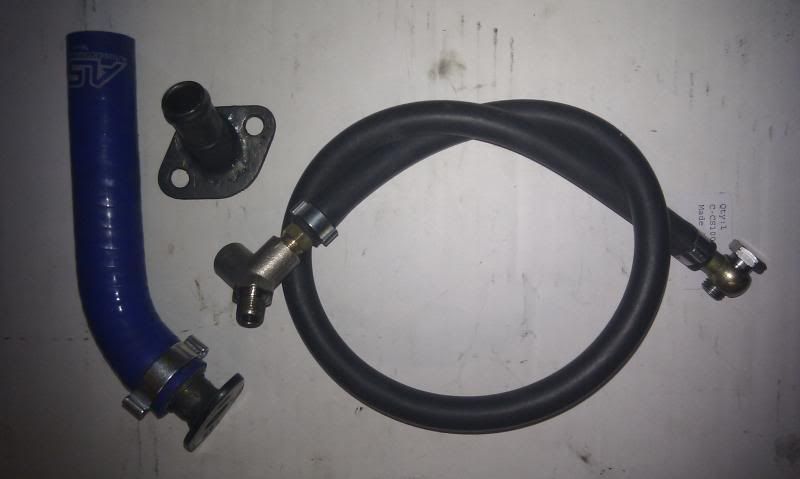
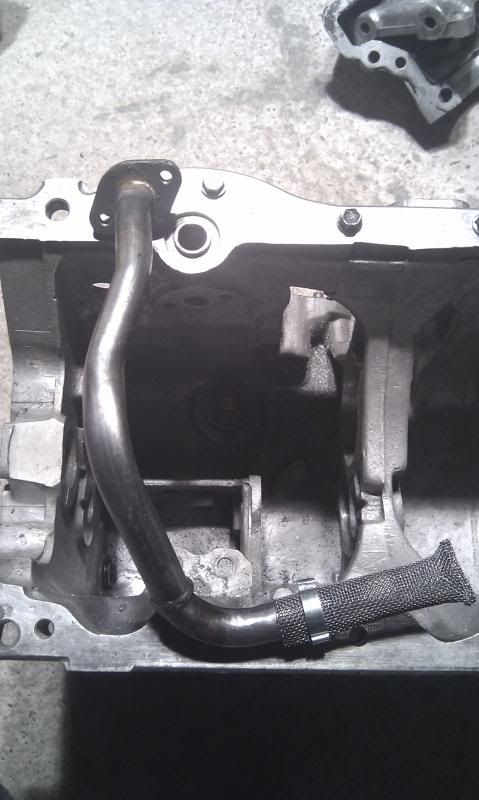
A few more bits welded up. I made the flanges from scrap and the central oil pick up from two normal pickups. I know you can easily buy these parts, but my budget is very tight. If I can make the part for nothing, it's £50 to spend somewhere else ( and it's surprising how quickly the £50 spends add up!)

The oil drain goes into the back of the gearbox. In the 2nd pic, it's just to the left to the oil pick up holes in the casting.


PhilR

User Avatar

696 Posts
Member #: 10034
Post Whore

Birmingham

This was a nice way-point to reach; I trial fitted the engine and turbo and it fits perfectly with no bulkhead mods *smiley*


There's a long way to go, but it feels like eberything is downhill from here *happy*


sim_ou_nao

User Avatar

361 Posts
Member #: 114
Senior Member

Porto/Portugal

Do have any idea how to make the down pipe?

Pedro Silva

http://miniciados.blogspot.pt/


PhilR

User Avatar

696 Posts
Member #: 10034
Post Whore

Birmingham

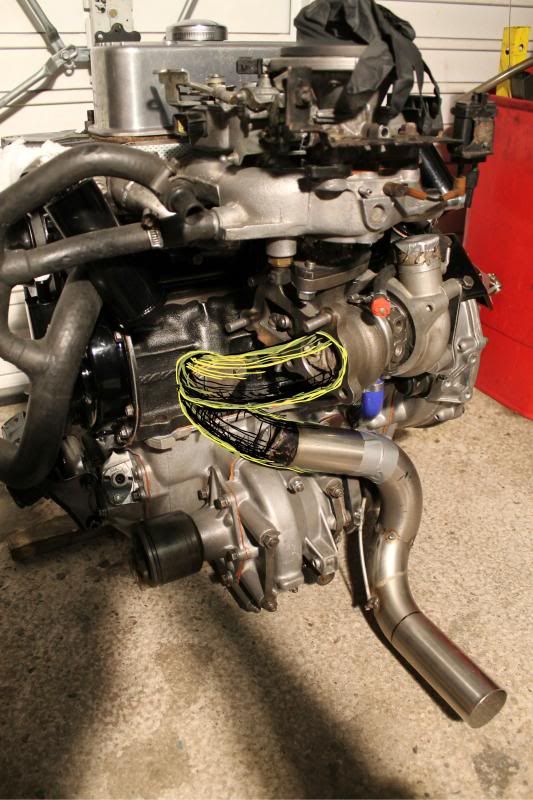
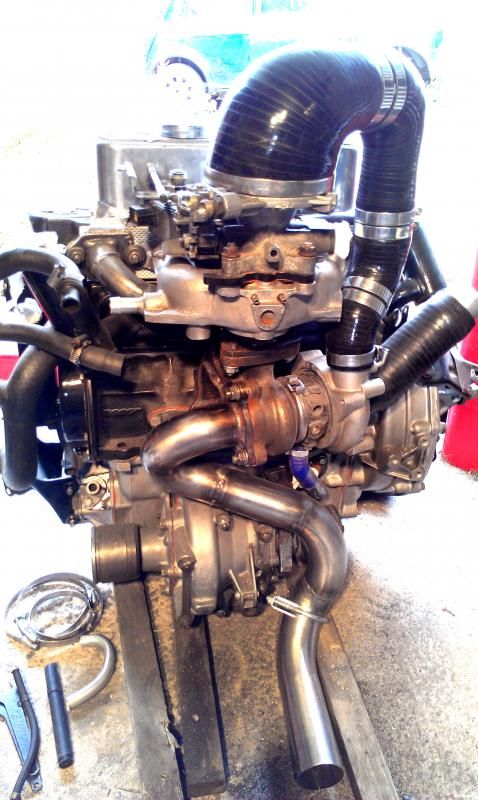
I've used 4 X 2" stainless 90 degree bends -


I wanted to get the turbo in as close to the engine as possible to avoid cutting the bulkhead which means the exhaust exits on the 'wrong' side. From the turbo, it does a tight 180, then runs over the top of the diff casing and around past the right hand C.V. joint.

The first bend needs to be a little tighter than the bends I bought so I cut slits on the inside of the bend, pulled the tube into a tighter bend, and welded it back up.

The angles were fine, but the MIG welds were poor, so I cut that piece out and will attempt it again after I'm more confident with my TIG

I don't have a picture before I cut out the 1st section, but this should give you an idea. Please excuse the Photoshop doodle...


PhilR

User Avatar

696 Posts
Member #: 10034
Post Whore

Birmingham

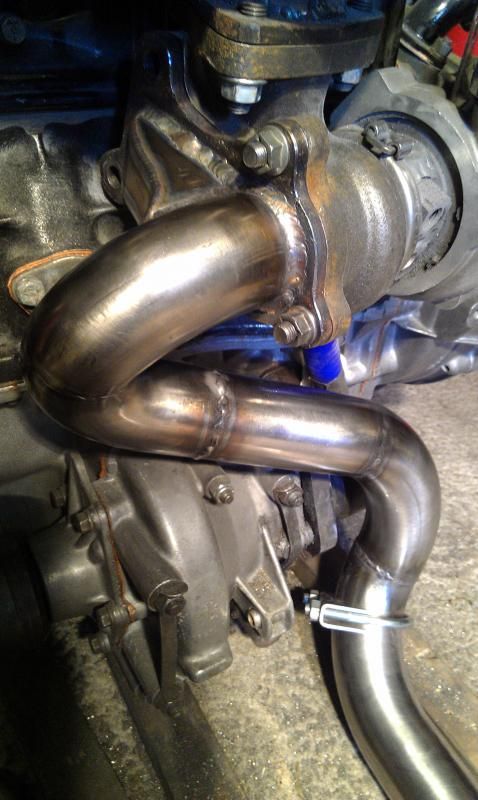
I found some tighter radius bends for the part of the downpipe, so welded them in... I think this is the 1st part I've completed with my new welder, yay *Clapping*


Edited by PhilR on 11th Jul, 2014.


PhilR

User Avatar

696 Posts
Member #: 10034
Post Whore

Birmingham

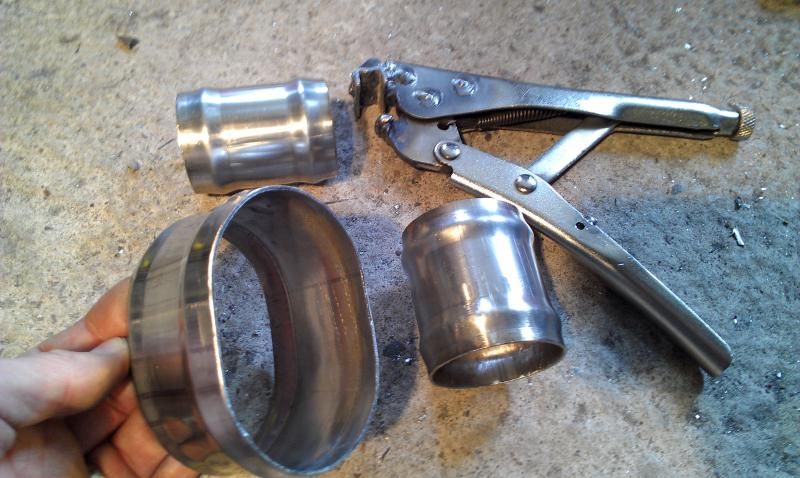
To get from the turbo outlet (44mm) to the inlet manifold (102mm), I went with silicone reducer hoses and swaged joiners.

I couldn't find joiners that I was happy with, so made a tool to put swaged ends on plain tube. I've made up several that are about half the length of any that I could buy (50mm vs 100mm). Also, dead cheap *smiley*


PhilR

User Avatar

696 Posts
Member #: 10034
Post Whore

Birmingham

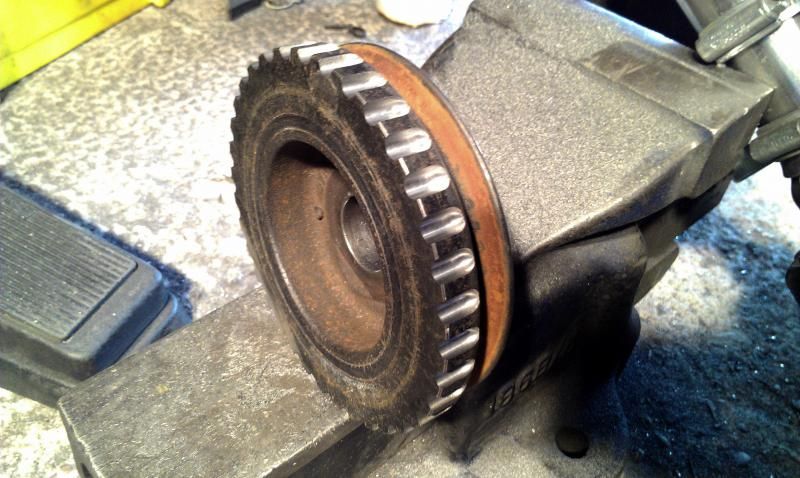
I started making my timing wheel out of a 1275 crank damper pulley. It will be a 36-1 wheel...


Once I've made a bracket to hold the sensor, I'll cut the missing tooth, balance it, and paint.

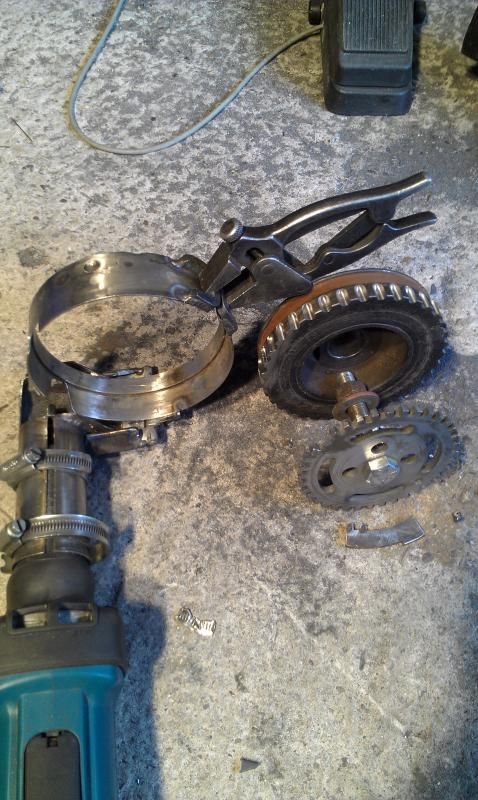
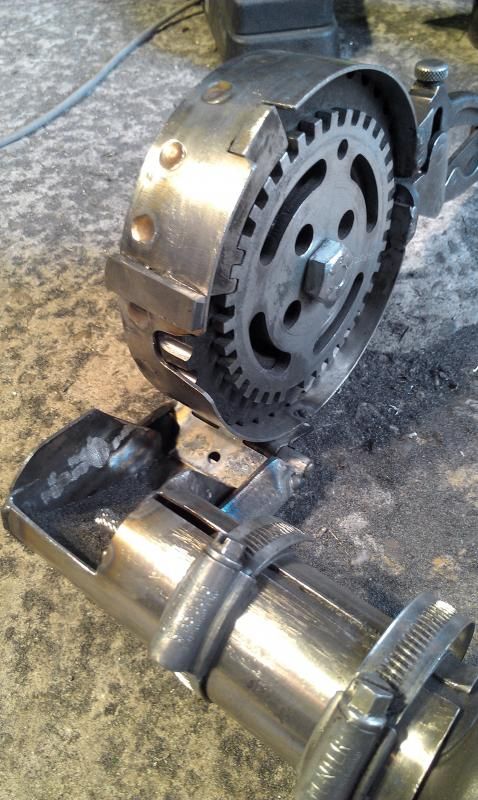
I don't have access to anything as fun as a milling machine, just my power tools / hand tools. I made a jig out of scrap that holds my die grinder on one side and the flywheel pulley on the other. There's a hinge that brings the two halves together to make the cut. The pulley has a standard 36-1 timing wheel bolted to it so I can rotate the pulley in the jig 10 degrees after each cut.


I took some quick measurements after the 1st dozen cuts, and the distance between teeth seems to vary by no more than 1/4 degree, and visually, each cut is straight and level.


theoneeyedlizard

User Avatar

7265 Posts
Member #: 1268
The Boom Boom speaker Police!

Essex

Love a homemade tool. Very nice.

In the 13's at last!.. Just


vegar

User Avatar

520 Posts
Member #: 189
Post Whore

Norway

Long 8 weeks *wink*

Looking good. Everybody likes a homemade tool :)

www.shag.no


apbellamy

User Avatar

16540 Posts
Member #: 4241
King Gaycharger, butt plug dealer, Sheldon Cooper and a BAC but generally a niceish fella if you dont mind a northerner

Rotherham, South Yorkshire

Good skills.

On 11th Feb, 2015 robert said:
i tried putting soap on it , and heating it to brown , then slathered my new lube on it

*hehe!*


Billus89

User Avatar

359 Posts
Member #: 8931
Senior Member

Herefordshire

That tool idea is incredible! Amazing skills!


Carlzilla

User Avatar

3673 Posts
Member #: 9300
Post Whore

Quarry Bonk

Some good ideas in here and ingenuity (sp?) but I too have a SIP welder which ive modded, but yet to set it up yet so I wont know how well it works, added a separate PSU for the wire feed motor which adds motor braking, along with the wire feed strap.

On 26th Jan, 2012 Tom Fenton said:
ring problems are down to wear or abuse but although annoying it isn't a show stopper

On 5th Aug, 2014 madmk1 said:
Shit the bed! I had snapped the end of my shaft off!!

17.213 @ 71mph, 64bhp n/a (Old Engine)

Home > Show Us Yours! > Turbo Cooper - floor repairs
Users viewing this thread: none. (+ 2 Guests)   Next ->
To post messages you must be logged in!
Username: Password:
Page: