Donations towards server fund so far this month.

 
£0.00 / £100.00 per month
Page:
Home > Show Us Yours! > My ever lasting project

Nick
Forum Mod

User Avatar

4828 Posts
Member #: 154
Post Whore

Midlands

That's pretty cool then, glad they're a full replacement panel so there's no shonky step in the gutter.

I need to speak to ABS and see what theres are like, i'm only after a fibreglass version.

On 20th Oct, 2015 Tom Fenton said:

Well here is the news, you are not welcome here, FUCK OFF.


mini93

User Avatar

834 Posts
Member #: 2017
Post Whore

Warwick.

Got a few things and now got almost got all the major components for the braking system.

I also have a pedal box on back order. I will incorperate the mount for the box and the lower steering column mount together.

I also got some Aerocatches for the bonnet and boot. Need to make up some mounts for this.

So I recieved a front splitter from ABS, I have started started trial fitting. Im not 100% sure if I like the look though. The idea of it is to lower the front end slightly, so that it sits level with the floor, this will allow me to fit an under tray and semi-flat floor. Need to decide before I chop away behind the splitter, It'll allow me to fit any radiator or intercooler lower down. I'll incorperate the front end forward mounts and rad mounts to the under tray mounts. Now I need an Intercooler and Rad for mock up purposes


Gawwd it looks high though. Damn new cones. I might put the old engine in to see how much it goes down by

David.


mini93

User Avatar

834 Posts
Member #: 2017
Post Whore

Warwick.

So i've gone off using the front splitter. Im not going to count it out fully yet, but ill just leave it for now and see later on.

I've also got my pedal box.


I've started fitting up, trying to get it into the correct space without clashing the steering column nor being too high and restricting where the lines need to feed in and out as my ally bulkhead is here


Actually in this pic it was too far right meaning the clutch pedal was clashing the lower UJ and I have since moved the box section.

I still need to weld mounts to the box section and when thats finalised join it up onto the cage dash bar. Then can make the steering column lower mount.

Also started getting the dash into place.


Filleted around the rollcage and seems a relitivly good fit. Mounts using riv-nuts riveted into the bulkhead, although these still could do with a bit of fine tuning and shaping.


Bit of trimming to accommodate the column. Should be hidden by the dash part still.


Ahh the carbony goodness!

David.


mw3

User Avatar

684 Posts
Member #: 9590
Post Whore

Derby

That a Curley carbon roof as well?

Matt W


On 14th Mar, 2012 mw3 said:
Got a nice big delivery from Carl at Force Racing today.


mini93

User Avatar

834 Posts
Member #: 2017
Post Whore

Warwick.

It is indeed, few imperfections in it, some scratches across the surface, but these will come out with a polish when I get it bonded in.

David.


mini93

User Avatar

834 Posts
Member #: 2017
Post Whore

Warwick.

Few more little things since last time and I have bought a few more bits n bobs


Pedal box is now in place. Welded mounts onto the box section. The ends will be shortened and tied up onto the dash bar with a removable brace across to steady the lower section of the steering column.


Seems a little biased right at the moment, but the pedals have the facility to shift the pads side ways.. I have since moved these over to allow for throttle pedal. Although the space would be fine for thin racing shoes, my normal trainers are a little more chunky up the toes.
And of course everything misses the steering column.


Started getting the top part of the dash into place. Not got all the mounts in place yet as i need to figure out how to attach the top part... bit restricted on access. Will also need to to cut the dash where the steering column will protrude through.


And also carrying on with the more bitty jobs, positioning the aerocatches on the bonnet and plates to attach. drilling the side windows into the shell and door.


Also think I have made a colour combo choice.


Well hopefully a bit of a deeper, touch darker red (some colours from work which i have an eye on) and obviously wont be painted by a guy in a dusty garage with a rattle can and with little idea of painting.

Carbon n red

I've had a few things through the post and started mocking up a few things.

I got some grey smoked headlamps (designed for the mk2 golf) obviously put into place here, but i have since taken it out to re-do the mountings.


bonnet aerocatches- gone for the underflushies, which will be painted too... not too bad of a job but I need to make up some mounts for the pins (one of the jobs for next week)


Clubman LED front indicators, Seem quite nice, they come on an ABS plastic backing so I just need lenses in order to fit up. so quite reasonable not having to source OE items. I also have light boards for the rear lamps at the same time.

Today i got a gold mine of googies though...


Recaro SP-G seats, steel side mounts (got a pair obviously) Hoping to get these mounted next week also.


Seat rails... I chopped out the old rails due to space confinements.


Quick release fittings, little pricey but nice simple things. Will use them for the front lower mountings.


Race technology DASH2 does quite a lot of cool stuffs, revs, speed, gear indicator and trip as well as option to show various outputs.

I have a week of shut-down at work next week and with a list already comprised hopefully I can get quite a bit done. Just hope the weathers not crappy!

David.


D4VE

User Avatar

2974 Posts
Member #: 10749
Post Whore

lowestoft suffolk

Liking it! Where have you got your led clubman lights and the rears too? And how do the quick release lower mounts work?

On 24th Oct, 2015 jonny f said:
Nothing gets past Dave lol

NOTHING GETS PAST ME!! *tongue*

1/4 mile 14.7 @ 96mph 12psi boost
Showdown class A 2nd place 18.6 @ 69mph


mini93

User Avatar

834 Posts
Member #: 2017
Post Whore

Warwick.


Just a ball join that pops into the back and locks in with ball bearings. You push the centre to release.

David.


mini93

User Avatar

834 Posts
Member #: 2017
Post Whore

Warwick.

Still chipping away at my list.


Seat rails welded in. Stitched to the floor has added strength the cross brace would have provided.


I had to modify the steering column position when I got the seats in. Longer bracket and re-angled.


Column welded with the Q.R spline and wheel fitted (temporary wheel) and DIM fitted behind. Will of course be a few other gauges but less clutter the better.


Got final fit on the front end which allowed me to fit up the bonnet and the pins. Due the debth of the Aerocatches I had to get some brackets to sit the pins lower. Turned out OK but was a bit of a pain to look half decent.


Trial fitted the engine, not the engine I will be using but to allow me to fit up some other components such as gear linkage (which I have started on today)


Got the boot lid fitted up, aerocatches and pin mounts too and also fitted on the bumper mount. Although the mounts will more than likely get changed when I make up the diffuser bracketry.


Still not 100% sure if I DONT want to use the front splitter. With the splitter fitted, the lowest edge is in line with the body floor and also the sump, which'll allow me to fit the under tray easier... just need to decide... fashion over function?


David.


minimole23

4304 Posts
Member #: 1321
Post Whore

Wiltshire

I like that front splitter

On 7th Oct, 2010 5haneJ said:
yeah I gave it all a good prodding


ministef1

User Avatar

730 Posts
Member #: 1791
Post Whore

Cranleigh, surrey

I do too. Its a bit different

"Cars are a lifetime of pain"


nky_84

User Avatar

218 Posts
Member #: 9213
Senior Member

Scotland

looking good. where did you buy the quick release fittings from?


jamestar

User Avatar

489 Posts
Member #: 9159
Senior Member

Devon

I don't suppose you ever weighed the new semi tubular front subframe?


mini93

User Avatar

834 Posts
Member #: 2017
Post Whore

Warwick.

Nope I didnt.

Actually in the end, I ended up getting a new (2nd hand) front subframe for it. The semi-tubular one wasnt finished by anycase. Would have put quite a few more holes into it.
I wasn't happy with some of the alignment of the one I hacked apart... either it was naff to start with, or I had accidently allowed it to move when I added the bars in, but I wasn't prepaired to use it when it could throw the alignment out of whack. Afterall, the cars for going around corners, not a straight line queen!

David.


jamestar

User Avatar

489 Posts
Member #: 9159
Senior Member

Devon

Ahh fair doos. Yeah thats not something you want to be wrong as it'll mess your geometry right up.

How's progress coming along with it?


gr4h4m

User Avatar

4890 Posts
Member #: 1775
Post Whore

Chester

I like the splitter

I run a supercharger and I don't care the TB is on the wrong side.
VEMS + 12 PSI + Liquid Intercooler = Small Bore FUN!


mini93

User Avatar

834 Posts
Member #: 2017
Post Whore

Warwick.

I was hoping you wouldn't ask that *tired* Not as much done as I really have liked, especially in the last few months.

I have done a few things which I havent updated on here though.


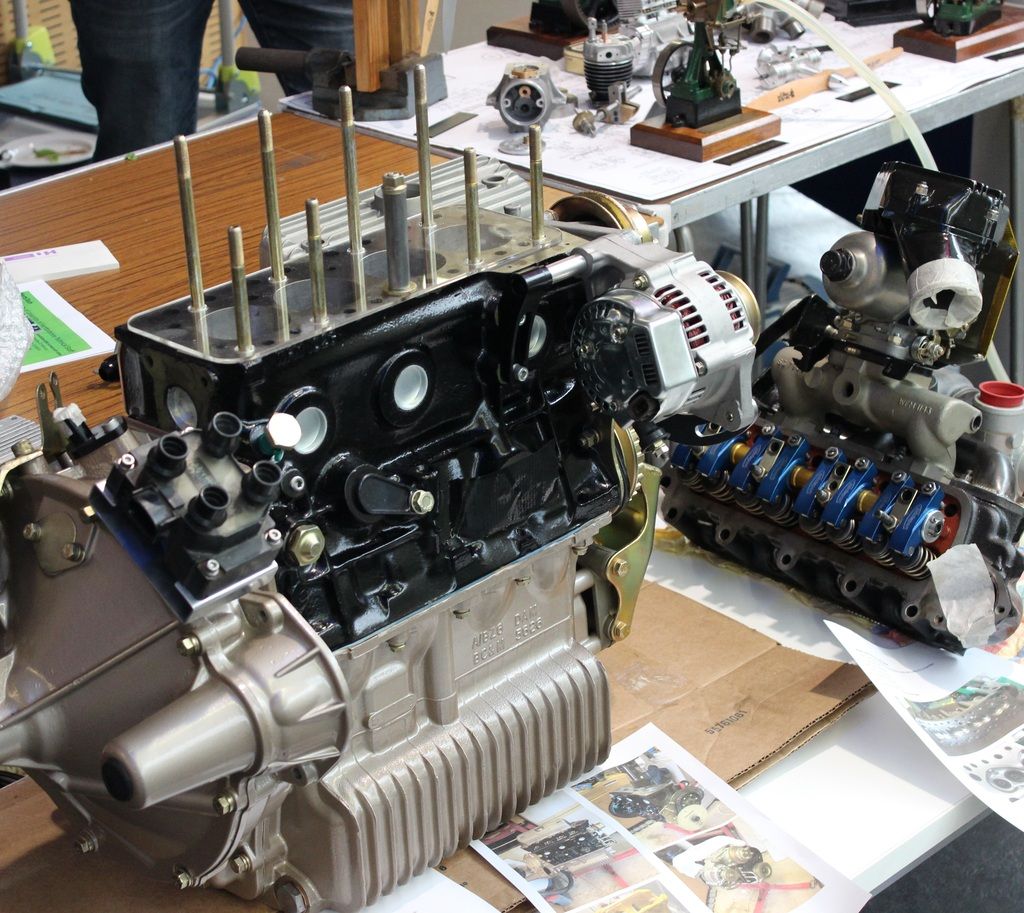
Got myself a donor block for the engine build. Something I have relayed in another thread is that i'll be using a remote turbo arrangment, the turbo is currently away with Matty, who's going to produce the manifolds for me.
I'm also 95% sure I want to use injection on this build. I had started a thread questioning about specialist components injection set ups but now heavily leaning to the megaquirt arrangment- Got about 7 tabs open in another browser window trying to dredge all the information up.


New Shiney pistons and a Phase 2 cam.
They're the 6cc offset dish. With the 28.5cc in the cylinder head I need to drop the CR just a little further, with being a fresh block I should be able to run the pistons down the bore an amount, worse comes to worse, I can get a bit more out the dish without risking the strength of the piston.


Con-rods...
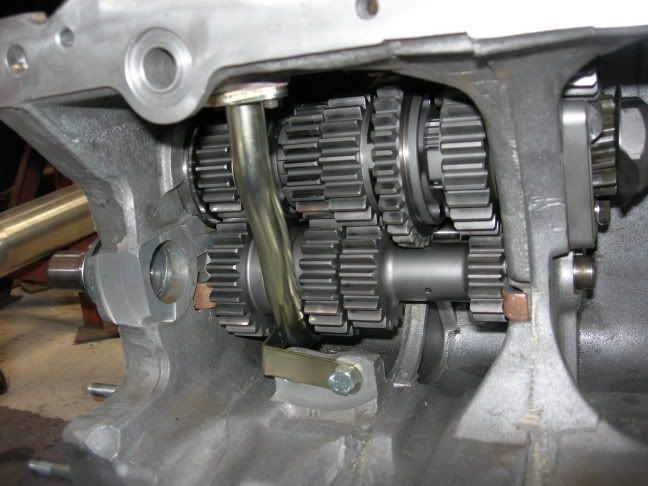
Will be taking the lot up to Southam Mini & Metro centre at some point, get the assembly machined up, balanced, get the crank worked. Still want to get a main strap assembly before that incase a line-bore is required.


Away from the engine front.

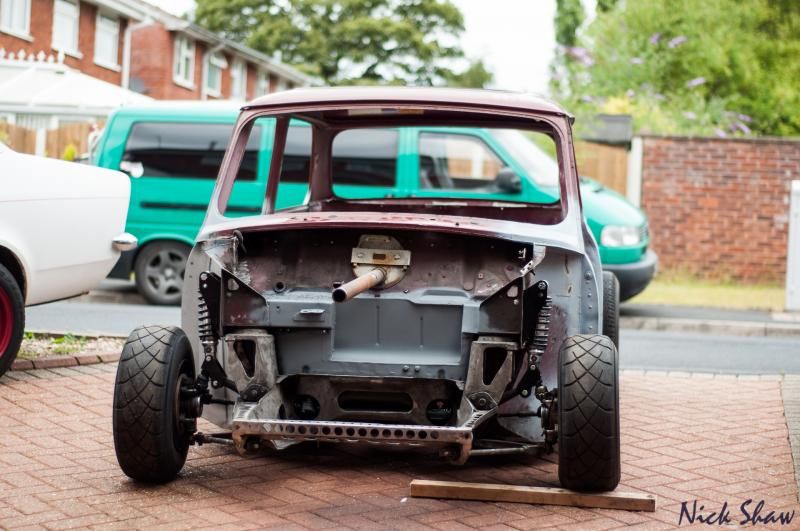
Custom grille's mostly sorted. It's now a single piece. The middle has been welded across, I then repeated the pattern across the middle and upto the edges following the curve of the headlamp surrounds.


Rear lights on. Thinking about tinting the lamps fully red rather than the normal amber, but not 100& sure yet.


And finally, I've started making the diffuser.

Not finished it yet... but where I stopped when the weather started to put me off.
The outside edges of the diffuser needs to change slightly, but shouldnt be too difficult.
Will have the exhaust slash cut smooth to the shape of the diffuser just before the end of the panel.

Hopefully I can find motivation to carry on soon...

David.


mw3

User Avatar

684 Posts
Member #: 9590
Post Whore

Derby

Looking good!! Like the diffuser, not that far off thinking about paint now??

Matt W


On 14th Mar, 2012 mw3 said:
Got a nice big delivery from Carl at Force Racing today.


mini93

User Avatar

834 Posts
Member #: 2017
Post Whore

Warwick.

Thanks!. Not quite to that point yet, I'm really hesitant to put it in paint before trial fitting every single part. I'd hate the idea of needing to drill the body to secure some wiring in place or to pass something through.
More likely I'll have to dry build it completely to the point its derivable... and somehow resist driving it in bare metal!

Looks very much like a car, but still a big chunk to do. Need to spec and assemble to cooling packs, injection and fuel system, engine assembly including putting in a plate diff and most likely an RTS clutch.
Still want to do some more aero stuff; under trays, inner wheel arches ect

Edited by mini93 on 4th Jan, 2016.

David.


jamestar

User Avatar

489 Posts
Member #: 9159
Senior Member

Devon


This is exactly what i'm like!


On 4th Jan, 2016 mini93 said:
I'm really hesitant to put it in paint before trial fitting every single part. I'd hate the idea of needing to drill the body to secure some wiring in place or to pass something through.
More likely I'll have to dry build it completely to the point its derivable... and somehow resist driving it in bare metal!


Where did you get your phase 2 cam from? is it a new billet one or a regrind?


Nice work on the diffuser, have you read race car aerodynamics by Joseph Katz and competition car aerodynamics by Simon McBeath? I've found them really helpfull


mini93

User Avatar

834 Posts
Member #: 2017
Post Whore

Warwick.

Got the cam and pistons from AVR classics, a billet jobby it is too.


No, I haven't read anything about aerodynamics, I'm only going on the very basics I learnt at university... More than anything its smoothing the underside than being designed with detailed intent- It's bound to be better than having the valance there.
The idea about wanting to put wheel arch liners and under tray in there is to control the air, wheels are an area of high turbulance as you would know if you have read your mentioned books.

Also just a bit of air managment into the engine bay, will be ducting the front end so all air entering the grilles will be used for either intercooler, radiator or induction. I know a lot of air will want to exit the underside of the car, not really sure how best to manage this if I start closing off the exit paths, I wont have sufficient flow, and i'm not about to start hacking holes into the bonnet either.

David.


Mike-998

User Avatar

882 Posts
Member #: 9774
Post Whore

Buckinghamshire

I read a very good build thread the other day that had lots of detail on aerodynamics and managing airflow. Car is a mx-5 but all the principles are the same, just the high and low pressure areas in slightly different places.

It's a long read but there's tons of information in there on how to do it all DIY as well. There's a lot in info on flat floors and rear diffusers there that might interest you.

http://clubroadster.net/vb_forum/89-roadst...ild-thread.html

http://www.turbominis.co.uk/forums/index.p...tid=469104&fr=0


mini93

User Avatar

834 Posts
Member #: 2017
Post Whore

Warwick.

Working hard? or hardly working?


Definitely the latter.


But today I've got another piece for the puzzle...


It's of course a GT20 side mount set up from Matt at Fusion Fabricaions, ace looking bit of kit. Lovely looking, better flowing, power producing and umm, better weight distrubution in the engine bay?.... sure...

So then I of course set straight to putting it in place, housed nicely in the engine bay.

I had to time the housing round a bit more so as to not have the outlet pointing at the bonnet. It now sits in a nice position to have only short pipe work to the front mount cooler (that i've still to buy)

Down side here being that the actuator will need to have a custom bracket as it no longer sits on the as-cast mount. Shouldn't be too tasking!


Here it is on Matt's trial engine so you can see the work that went into it.


Another issue which I had already thought arise, the top engine steady... hardly the biggest issue as I was always going to be re making the mounts with the rod-ends. It'll just have to come off at a funny angle to reach the bulkhead, unless I find another position for it anyhow.

I've also pretty much decided I want fuel injection on the engine... little point doing all this work and using the ol' carrot and bucket fueling method.

Asked a while back on here about fuel injection, one of the guys prompted me onto going megasquirt.... and its completly baffled me, but I have like 9 tabs open in another brouser for me to read over and work out how to go about it... I'm no whizz so I'll be leaching off other peoples findings and clamering my way through it at some point.

There's a few things I hope the system is capable of, but will have to see when I read through.

Anyway, thats enough for now, hopefully I can get on with doing some work on the thing soon.


Dave.

David.


Rammie2000

User Avatar

1750 Posts
Member #: 10190
Post Whore

belgium

what does that exhaust cost?

you can do anything if you set your mind to it...
i rather blow it up winning than keep it together losing.

finish date set for project 1... march 2018


D4VE

User Avatar

2974 Posts
Member #: 10749
Post Whore

lowestoft suffolk

I like that!!

On 24th Oct, 2015 jonny f said:
Nothing gets past Dave lol

NOTHING GETS PAST ME!! *tongue*

1/4 mile 14.7 @ 96mph 12psi boost
Showdown class A 2nd place 18.6 @ 69mph

Home > Show Us Yours! > My ever lasting project
Users viewing this thread: none. (+ 4 Guests) <- Prev   Next ->
To post messages you must be logged in!
Username: Password:
Page: