| Page: |
| Home > Show Us Yours! > Metro; the engine build; updated May 2016 | |||||||
|
Site Admin  15300 Posts Member #: 337 Fearless Tom Fenton, Avon Park 2007 & 2008 class D winner & TM legend. |
1st Jun, 2015 at 05:05:44pm
Rob, many production cars have radiator, air con condensor and intercooler sandwiches together these days, its no problem. Obviously the intercooler goes at the front!
On 29th Nov, 2016 madmk1 said:
On 28th Nov, 2016 Rob Gavin said:
I refuse to pay for anything else Like fuel 😂😂 |
||||||
|
Site Admin  15300 Posts Member #: 337 Fearless Tom Fenton, Avon Park 2007 & 2008 class D winner & TM legend. |
1st Jun, 2015 at 05:13:26pm
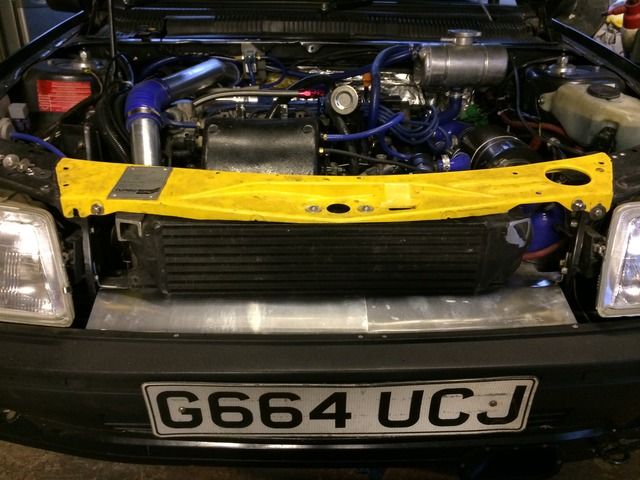
Here's one I did recently. The radiator was a specially made short but double width thing. The intercooler sits on top, the ally cowl directs all the air that comes through the grille straight to the intercooler.
On 29th Nov, 2016 madmk1 said:
On 28th Nov, 2016 Rob Gavin said:
I refuse to pay for anything else Like fuel 😂😂 |
||||||
|
4314 Posts Member #: 700 Formerly British Open Classic The West Country |
1st Jun, 2015 at 07:02:27pm
On 1st Jun, 2015 John said:
Have you managed to get a MK2 turbo bonnet for it? I seem to recall after a shunt JF ended up with a MK1 bonnet on it which doesnt match the grill profile. Other option would be to MK1 the front end which would give you more room at the back of the grill for intercooler etc. Looks like a naturally aspirated bonnet to me. Isambard Kingdom Brunel said:
Nothing is impossible if you are an Engineer |
||||||
 16540 Posts Member #: 4241 King Gaycharger, butt plug dealer, Sheldon Cooper and a BAC but generally a niceish fella if you dont mind a northerner Rotherham, South Yorkshire |
1st Jun, 2015 at 07:10:00pm
I had to chop of the rad brackets and make new ones a bit further back on the van.
On 11th Feb, 2015 robert said:
i tried putting soap on it , and heating it to brown , then slathered my new lube on it 
|
||||||
 6729 Posts Member #: 618 Post Whore Glasgow |
1st Jun, 2015 at 07:42:35pm
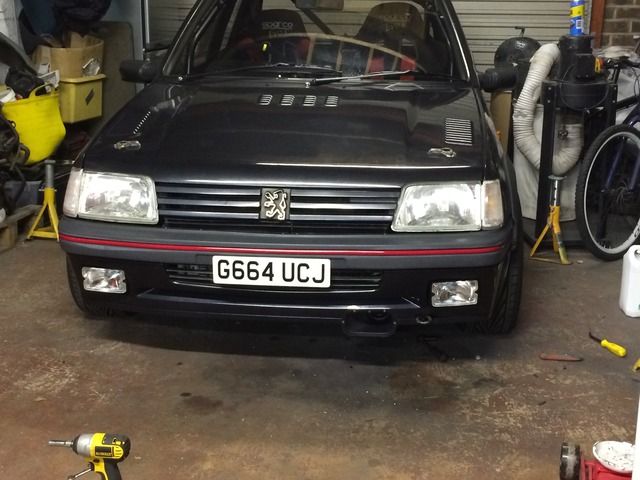
Only got a standard bonnet on it for now. I could go for the mk1 style but would need mk1 lights. I think i prefer the mk2 look but will wait and see
On 1st Jun, 2015 John said:
Have you managed to get a MK2 turbo bonnet for it? I seem to recall after a shunt JF ended up with a MK1 bonnet on it which doesnt match the grill profile. Other option would be to MK1 the front end which would give you more room at the back of the grill for intercooler etc. |
||||||
 6729 Posts Member #: 618 Post Whore Glasgow |
1st Jun, 2015 at 07:46:03pm
Cheers guys. The rad in the car was a special and a bit thicker than standard. I'm going to have a look and see what i can create space wise but i recon the TD5 cooler could be a good option. |
||||||
 6729 Posts Member #: 618 Post Whore Glasgow |
2nd Jan, 2016 at 09:54:37pm
Well its been a while since the last update. Work has been a bit busy which has stopped most progress in the last few months, however i have made some progress.
|
||||||
 5417 Posts Member #: 6181 Double hard bastard brookwood woking |
2nd Jan, 2016 at 09:59:23pm
Wow that ic, fits just nice in there! I have started posting on Instagram also my name on there is turbomk1golf
On 1st Nov, 2007 Ben H said:
There is no such thing as 'insignificant weight saving', it all adds up. |
||||||
 6729 Posts Member #: 618 Post Whore Glasgow |
2nd Jan, 2016 at 10:01:05pm
Certainly does. |
||||||
 2974 Posts Member #: 10749 Post Whore lowestoft suffolk |
3rd Jan, 2016 at 12:32:07am
I like it! On 24th Oct, 2015 jonny f said:
Nothing gets past Dave lol NOTHING GETS PAST ME!! 
1/4 mile 14.7 @ 96mph 12psi boost Showdown class A 2nd place 18.6 @ 69mph |
||||||
|
3004 Posts Member #: 2500 Post Whore Buckinghamshire |
3rd Jan, 2016 at 08:49:26am
Rob I still reckon it is worth sealing all round that IC to ensure the air goes through it rather than round it - Tom said something similar back in June. |
||||||
 10021 Posts Member #: 1456 Mongo Barnsley, South Flatcapshire |
3rd Jan, 2016 at 01:00:08pm
We ducted the vans in and noticed a drop in water temp more than anything. If something is worth doing, it's worth doing half of. |
||||||
 2500 Posts Member #: 648 Post Whore Northern Ireland (ex AUS) |
4th Jan, 2016 at 02:04:12am
I think I must suffer from intercooler envy but that's a neat installation. On 7th Nov, 2008 Nic said:
naeJ m !!!!!!sdrawkcab si gnihtyreve ?droabyekym ot deneppah sah tahw ayhwdd |
||||||
 6729 Posts Member #: 618 Post Whore Glasgow |
4th Jan, 2016 at 12:49:53pm
Ducting is on the cards but goung to concentrate on getting it running first |
||||||
 10021 Posts Member #: 1456 Mongo Barnsley, South Flatcapshire |
4th Jan, 2016 at 01:07:06pm
I'd also recommend the oil cooler, we always struggled with oil temps on the van, we were planning on installing an oil cooler but never got around to it. If something is worth doing, it's worth doing half of. |
||||||
 6729 Posts Member #: 618 Post Whore Glasgow |
4th Jan, 2016 at 01:08:20pm
Was that on the road john or on the strip? |
||||||
 10021 Posts Member #: 1456 Mongo Barnsley, South Flatcapshire |
4th Jan, 2016 at 02:29:54pm
On the road Rob mostly but we did a sprint in it too where we were going round & round and the oil was getting pretty warm then. If something is worth doing, it's worth doing half of. |
||||||
 6729 Posts Member #: 618 Post Whore Glasgow |
4th Jan, 2016 at 02:41:52pm
Cheers John. Will maybe spend a bi try of time on that now. I could go low down but worried about damage |
||||||
 10021 Posts Member #: 1456 Mongo Barnsley, South Flatcapshire |
4th Jan, 2016 at 03:31:38pm
Looking at that rad and intercooler could you get at least "some" of the oil cooler core behind the intercooler can't imagine you would need more than a few rows of it exposed to the airflow to keep temps in check for sprinting/hillclimbing. If something is worth doing, it's worth doing half of. |
||||||
 6729 Posts Member #: 618 Post Whore Glasgow |
14th Apr, 2016 at 08:16:29am
well its been a while and, I'm happy to say, progress has been made if not a little slowly.
|
||||||
 6729 Posts Member #: 618 Post Whore Glasgow |
25th Apr, 2016 at 08:54:57am
well a bit of progress made on Saturday. I got items, 1,3,4,9 & 11 ticked off the list on Saturday PM.
Edited by Rob Gavin on 25th Apr, 2016. |
||||||
 5417 Posts Member #: 6181 Double hard bastard brookwood woking |
25th Apr, 2016 at 09:38:46am
I do like the look of this car lots!
I have started posting on Instagram also my name on there is turbomk1golf
On 1st Nov, 2007 Ben H said:
There is no such thing as 'insignificant weight saving', it all adds up. |
||||||
 6729 Posts Member #: 618 Post Whore Glasgow |
8th May, 2016 at 07:10:23am
Well after making some temporary lines and correcting a significant schoolboy error in the fueling system, i had some success last night
Edited by Rob Gavin on 9th May, 2016. |
||||||
 4890 Posts Member #: 1775 Post Whore Chester |
8th May, 2016 at 10:12:21am
Looking good I run a supercharger and I don't care the TB is on the wrong side.
|
||||||
 6729 Posts Member #: 618 Post Whore Glasgow |
24th Feb, 2017 at 09:21:59am
Well, its been a while since my last update. Fuel lines needed replacing after finding the failed hoses so needed to save up for some goodridge stuff before I could move on.
|
||||||
| Home > Show Us Yours! > Metro; the engine build; updated May 2016 | |||||||
|
|||||||
| Page: |

