| Page: |
| Home > Show Us Yours! > Craig's mini engine Re-build. 1380 NA this time! | |||||||
 27 Posts Member #: 10013 Member Hockley, Essex |
11th Dec, 2013 at 03:55:20pm
My weber 40's choked down to 30mm, but it produces a nice amount of torque. Its the perfect engine setup with my 276. |
||||||
|
1492 Posts Member #: 9468 Post Whore Wootton Bassett |
18th Dec, 2013 at 05:23:40pm
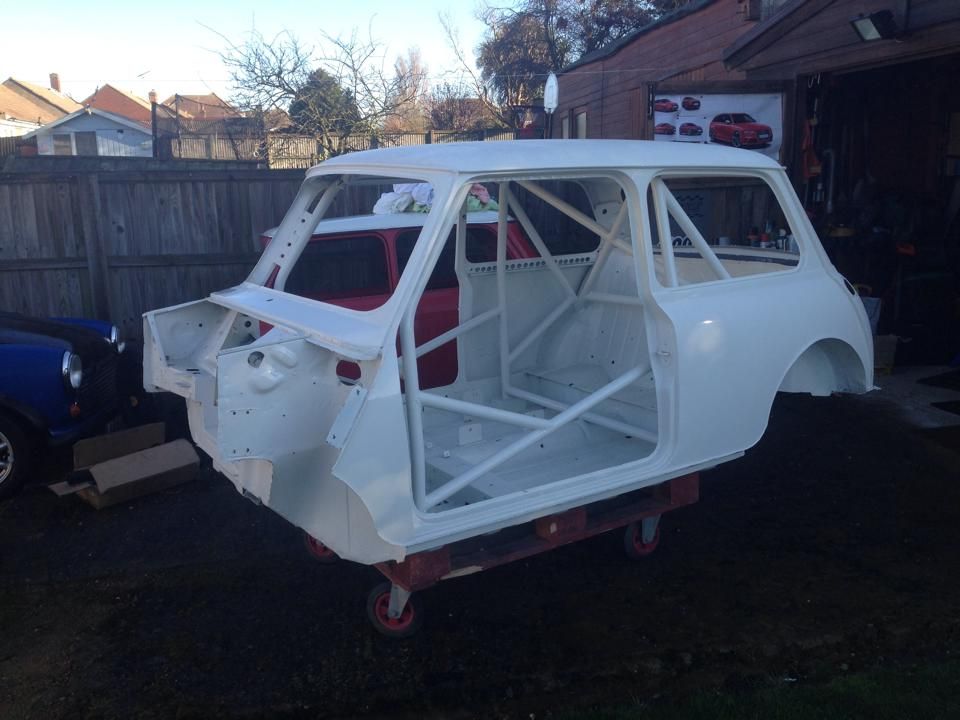
My dad went round next door a couple of days ago to ask permission to use the crane and so I have my usual source of engine lifting again :) with that said I have had a couple of days off work and so I set about making a start on the shell :)
On 10th Mar, 2012 theoneeyedlizard said:
Hypothetically speaking, where would you stick your nozzle? On 22nd Jun, 2012 apbellamy said:
my wife doesn't know what.head is never mind compression ratio. |
||||||
 412 Posts Member #: 9766 Senior Member Warwickshire |
19th Dec, 2013 at 12:36:02am
Good to see your cracking on with it mate, where are you doing the trackday in feb? I'm looking for a reason to get the car back out early next year :) Avon 2010 class c 3rd
|
||||||
|
1909 Posts Member #: 9764 Post Whore Northamptonshire. |
19th Dec, 2013 at 09:55:03am
Looking good dude good to see your back on it!! but how damp is in there to cause all that? |
||||||
|
971 Posts Member #: 3228 Post Whore North of the Netherlands |
21st Dec, 2013 at 12:44:00pm
Can imagine seeing it like this makes you sad..
Dazed and Confused.... |
||||||
|
1492 Posts Member #: 9468 Post Whore Wootton Bassett |
21st Dec, 2013 at 09:38:40pm
Thanks for the comments guys, yeah made me sad alright lol, however I had kept it outside for 9/10 months so that's why it was all corroded and rotten, plus after the heater tap exploded I didn't clean it up properly so that won't have helped either :/ On 10th Mar, 2012 theoneeyedlizard said:
Hypothetically speaking, where would you stick your nozzle? On 22nd Jun, 2012 apbellamy said:
my wife doesn't know what.head is never mind compression ratio. |
||||||
|
1909 Posts Member #: 9764 Post Whore Northamptonshire. |
21st Dec, 2013 at 09:48:37pm
Ah after a few mins with a wire brush you'll be okay |
||||||
 825 Posts Member #: 9661 Post Whore Sheffield South Yorkshire GB. |
22nd Dec, 2013 at 11:49:19pm
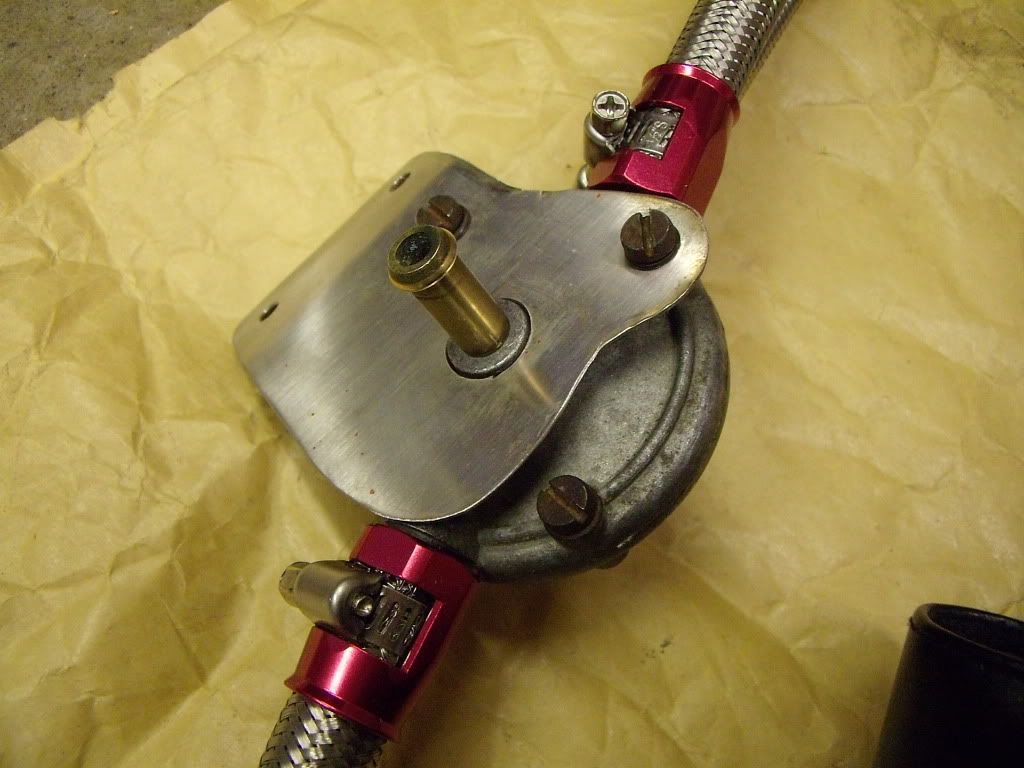
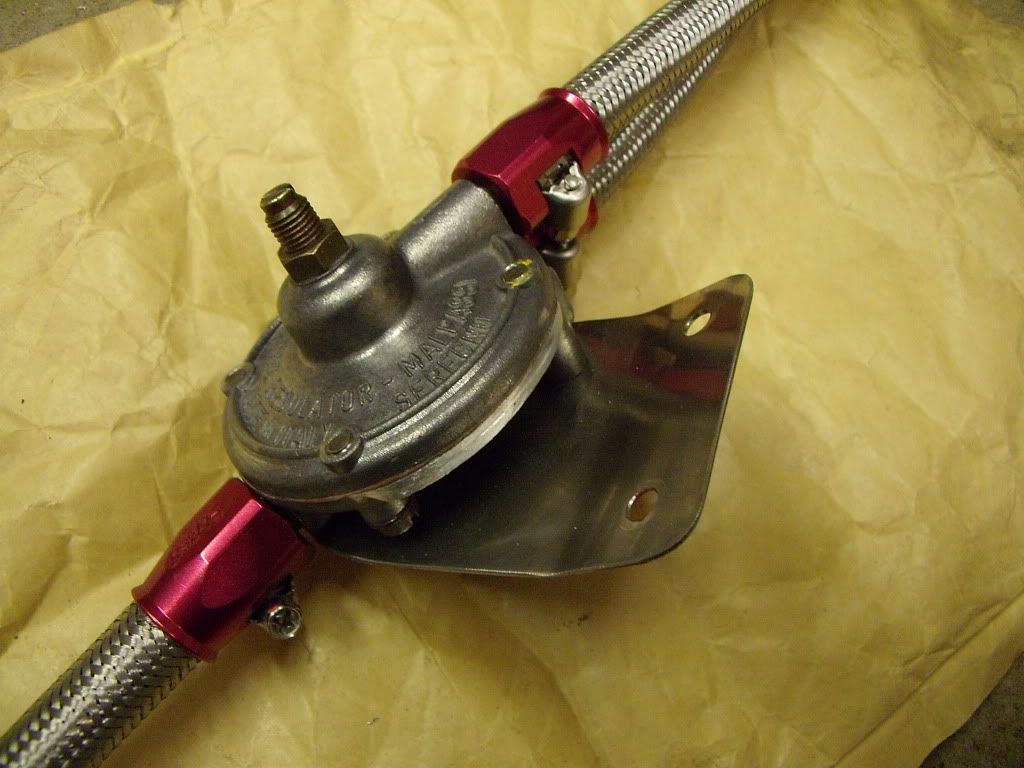
With reference to your fuel regulator I repaired mine this way.
Main Build
|
||||||
|
1492 Posts Member #: 9468 Post Whore Wootton Bassett |
27th Dec, 2013 at 04:59:40pm
Alan, I'll use this thank You :) On 10th Mar, 2012 theoneeyedlizard said:
Hypothetically speaking, where would you stick your nozzle? On 22nd Jun, 2012 apbellamy said:
my wife doesn't know what.head is never mind compression ratio. |
||||||
|
1492 Posts Member #: 9468 Post Whore Wootton Bassett |
1st Feb, 2014 at 07:57:48pm
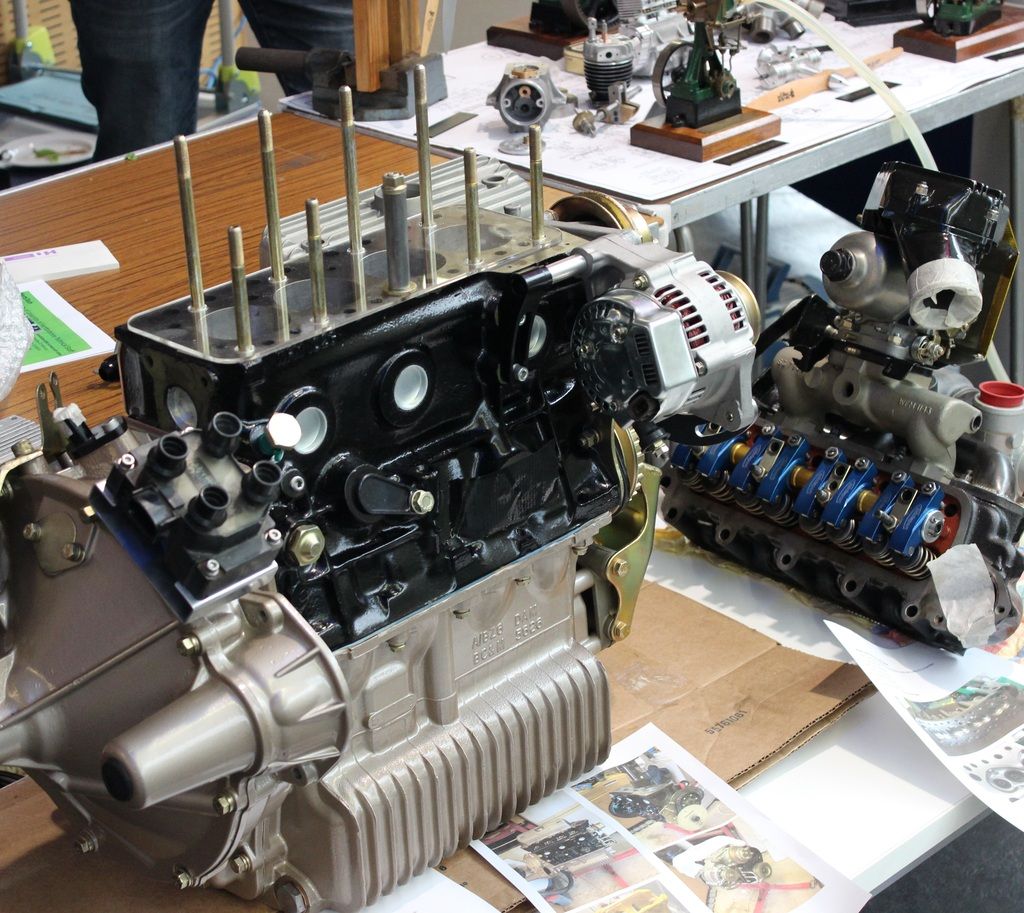
Finally got around to doing a little more to this lump.
On 10th Mar, 2012 theoneeyedlizard said:
Hypothetically speaking, where would you stick your nozzle? On 22nd Jun, 2012 apbellamy said:
my wife doesn't know what.head is never mind compression ratio. |
||||||
 882 Posts Member #: 9774 Post Whore Buckinghamshire |
1st Feb, 2014 at 08:24:57pm
Looks like a good engine then :) http://www.turbominis.co.uk/forums/index.p...tid=469104&fr=0 |
||||||
 6729 Posts Member #: 618 Post Whore Glasgow |
1st Feb, 2014 at 08:48:19pm
Engine looks pretty good to me |
||||||
 1767 Posts Member #: 9165 Previously josh4444 Australia, brisbane |
1st Feb, 2014 at 09:17:48pm
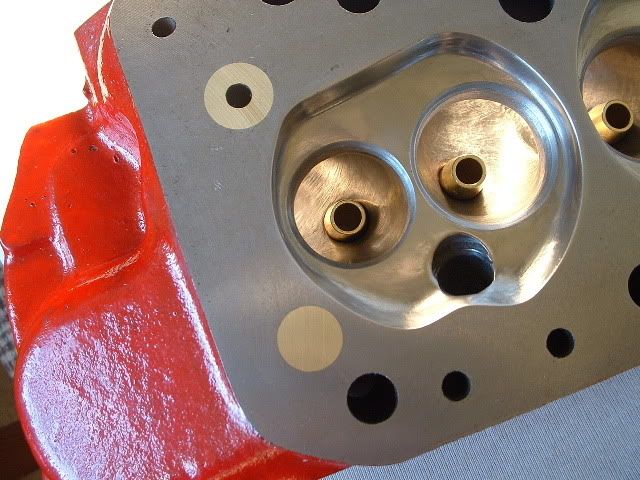
what caused those marks in the bores? is that the wrist pin or clips? |
||||||
|
1492 Posts Member #: 9468 Post Whore Wootton Bassett |
1st Feb, 2014 at 09:28:01pm
Thanks for the comments guys.
On 10th Mar, 2012 theoneeyedlizard said:
Hypothetically speaking, where would you stick your nozzle? On 22nd Jun, 2012 apbellamy said:
my wife doesn't know what.head is never mind compression ratio. |
||||||
 4625 Posts Member #: 20 My sister is so fit I won't show anyone her picture Lake District |
1st Feb, 2014 at 10:50:42pm
He's reffering to the vertical score marks in your last picture. Worth a better look.
|
||||||
|
1492 Posts Member #: 9468 Post Whore Wootton Bassett |
2nd Feb, 2014 at 08:40:33am
I'll have a look when I'm down there next :) On 10th Mar, 2012 theoneeyedlizard said:
Hypothetically speaking, where would you stick your nozzle? On 22nd Jun, 2012 apbellamy said:
my wife doesn't know what.head is never mind compression ratio. |
||||||
 6729 Posts Member #: 618 Post Whore Glasgow |
2nd Feb, 2014 at 09:20:38am
couldn't see any damage on the phone but just looked at in on the laptop and agree with the others |
||||||
 1767 Posts Member #: 9165 Previously josh4444 Australia, brisbane |
2nd Feb, 2014 at 09:50:28am
on second look those vertical marks cant be the wrist pin or clip
|
||||||
 16540 Posts Member #: 4241 King Gaycharger, butt plug dealer, Sheldon Cooper and a BAC but generally a niceish fella if you dont mind a northerner Rotherham, South Yorkshire |
2nd Feb, 2014 at 10:06:10am
On 1st Feb, 2014 Turbo This.. said:
what caused those marks in the bores? is that the wrist pin or clips? 
Not likely to be the pins unless the rods have twisted through 90 degrees without snapping. 
On 11th Feb, 2015 robert said:
i tried putting soap on it , and heating it to brown , then slathered my new lube on it 
|
||||||
|
1492 Posts Member #: 9468 Post Whore Wootton Bassett |
2nd Feb, 2014 at 06:33:13pm
On 2nd Feb, 2014 Turbo This.. said:
on second look those vertical marks cant be the wrist pin or clip the wrist pin runs the same way as the crank so the marks must be from broken rings or some foreign object stuck beside the piston? not sure but i guess if the marks are just that marks with out any damage to the bore ie cant catch fingernail or better yet have the shop take a look see? might be nothing to worry about but i think its worth checking out imo are you going to dismantle and rebuild this engine or clean are re assemble whats been taken off? On 10th Mar, 2012 theoneeyedlizard said:
Hypothetically speaking, where would you stick your nozzle? On 22nd Jun, 2012 apbellamy said:
my wife doesn't know what.head is never mind compression ratio. |
||||||
|
1492 Posts Member #: 9468 Post Whore Wootton Bassett |
10th Feb, 2014 at 08:53:22pm
Been down to the unit last week and had a play with the engines,
On 10th Mar, 2012 theoneeyedlizard said:
Hypothetically speaking, where would you stick your nozzle? On 22nd Jun, 2012 apbellamy said:
my wife doesn't know what.head is never mind compression ratio. |
||||||
 538 Posts Member #: 9393 Use the search function before buying stuff from me... stoke on trent |
10th Feb, 2014 at 09:10:38pm
Remember to price in a header tank if you go front mount |
||||||
|
1492 Posts Member #: 9468 Post Whore Wootton Bassett |
10th Feb, 2014 at 09:45:25pm
Yeah I was just looking at them on ebay might try and find a small cheap one in scrappy little bit annoyed as I had 6 clio ones at one point which might of been ideal On 10th Mar, 2012 theoneeyedlizard said:
Hypothetically speaking, where would you stick your nozzle? On 22nd Jun, 2012 apbellamy said:
my wife doesn't know what.head is never mind compression ratio. |
||||||
|
1492 Posts Member #: 9468 Post Whore Wootton Bassett |
23rd Mar, 2014 at 05:19:21pm
I have started a new job in London (fingers crossed this one works out!!) and as a result I commute 5/5:30 hours a day so only really get the weekends to play now. Finally got round to doing some on the mini, last time I was down there I got the bottom trigger wheel/pulley off and as I never painted it last time it was rotten and as I am using it as my trigger wheel for the ECU its kinda important.
Edited by Craigie-B on 23rd Mar, 2014. On 10th Mar, 2012 theoneeyedlizard said:
Hypothetically speaking, where would you stick your nozzle? On 22nd Jun, 2012 apbellamy said:
my wife doesn't know what.head is never mind compression ratio. |
||||||
 1767 Posts Member #: 9165 Previously josh4444 Australia, brisbane |
24th Mar, 2014 at 09:10:26am
nothing like a dead line to get things moveing
|
||||||
| Home > Show Us Yours! > Craig's mini engine Re-build. 1380 NA this time! | |||||||
|
|||||||
| Page: |




 so took the wok cover off to see if it had a lightened flywheel and found this:


