Donations towards server fund so far this month.

 
£0.00 / £100.00 per month
Page:
Home > Show Us Yours! > Craigie-B 1310cc t2 mini turbo project :) (updated 17/11/2012) Now MOT'd

Rob Gavin

User Avatar

6729 Posts
Member #: 618
Post Whore

Glasgow

Fantastic. Still trying for MITP?


Craigie-B

User Avatar

1492 Posts
Member #: 9468
Post Whore

Wootton Bassett

Ill be lucky mate, gotta be mot'd and taxed yet as well *tongue* Havent got my dad till Weds and he will do zorst then but I will remain hopeful :)

On 10th Mar, 2012 theoneeyedlizard said:

Hypothetically speaking, where would you stick your nozzle?


On 22nd Jun, 2012 apbellamy said:
my wife doesn't know what.head is never mind compression ratio.


Mike-998

User Avatar

882 Posts
Member #: 9774
Post Whore

Buckinghamshire

It's looking good though, I bet it's such a relief to have it all in finally *tongue*

http://www.turbominis.co.uk/forums/index.p...tid=469104&fr=0


Craigie-B

User Avatar

1492 Posts
Member #: 9468
Post Whore

Wootton Bassett

Yeah! but wierdly it doesnt because its been in an out so many times its like Im used to it having an engine haha. Getting it on all 4's tomorrow then Ill probably feel the relief haha

On 10th Mar, 2012 theoneeyedlizard said:

Hypothetically speaking, where would you stick your nozzle?


On 22nd Jun, 2012 apbellamy said:
my wife doesn't know what.head is never mind compression ratio.


eden7842

User Avatar

1755 Posts
Member #: 8852
Post Whore

leicestershire

better get a move on then, youve got 4 days for tax

13.95 1/4 mile on a 2.95 fd. Carnt be that hard to beat!


Craigie-B

User Avatar

1492 Posts
Member #: 9468
Post Whore

Wootton Bassett

ahh bugger I forgot about that!!!!!

On 10th Mar, 2012 theoneeyedlizard said:

Hypothetically speaking, where would you stick your nozzle?


On 22nd Jun, 2012 apbellamy said:
my wife doesn't know what.head is never mind compression ratio.


Craigie-B

User Avatar

1492 Posts
Member #: 9468
Post Whore

Wootton Bassett

Todays progress

Rear subframe mounts - Total pain in the arse couldnt get any of the holes to line up, had to lower and raise the subframe drag the bushes etc got them in eventually using 2 longer bolts so that I could actaully fit the spring washers on one of them.

Top and bottom tiebar's instaleld and tightened up - engien is solid now haha *happy*

Cleaned and Re-greased Pot Joints and Drive Shafts

Installed Driveshafts, hubs, discs and calipers - in the pouring rain I might add :/ took me 2 hours to dry my tools :'(

Heres the pics, no major write up as im knackered :(


End of the day:


Maybe more tomorrow :)

On 10th Mar, 2012 theoneeyedlizard said:

Hypothetically speaking, where would you stick your nozzle?


On 22nd Jun, 2012 apbellamy said:
my wife doesn't know what.head is never mind compression ratio.


Rob Gavin

User Avatar

6729 Posts
Member #: 618
Post Whore

Glasgow

Getting close now!


Craigie-B

User Avatar

1492 Posts
Member #: 9468
Post Whore

Wootton Bassett

yeah made a list today of almost everythign that needs doing, will get a piccie

On 10th Mar, 2012 theoneeyedlizard said:

Hypothetically speaking, where would you stick your nozzle?


On 22nd Jun, 2012 apbellamy said:
my wife doesn't know what.head is never mind compression ratio.


Yo-Han

User Avatar

971 Posts
Member #: 3228
Post Whore

North of the Netherlands

Not fitting the bracket over the engine steady clutch side?
Have seen bolts breaking without; pain in the back side to get out when sheared off close to the block..

Dazed and Confused....


nala56

User Avatar

825 Posts
Member #: 9661
Post Whore

Sheffield South Yorkshire GB.

As above, you need the brackets on that engine steady Craig or it will sheer, and could knacker the threads in the block.. Alan

Main Build
http://www.turbominis.co.uk/forums/index.php?p=vt&tid=489133

Upgrade to Turbo
http://www.turbominis.co.uk/forums/index.p...tid=448367&fr=0


bennyy

User Avatar

2233 Posts
Member #: 9037
Post Whore

Doncaster, yorkshire

Think I have one craig, although I can't think where

Audi s4 b5 - 470bhp & 486ft lbs

On 15th Mar, 2012 wil_h said:

Yes, Carl says he gets requests for rimming all the time

On 30th Apr, 2012 Brett said:
yeah stick the bit in and give it a wobble *wink*


Craigie-B

User Avatar

1492 Posts
Member #: 9468
Post Whore

Wootton Bassett

I didnt even know there wa a bracket ? :s

okay guys I guess I'll get one bought :)

PM'd Benny

On 10th Mar, 2012 theoneeyedlizard said:

Hypothetically speaking, where would you stick your nozzle?


On 22nd Jun, 2012 apbellamy said:
my wife doesn't know what.head is never mind compression ratio.


Craigie-B

User Avatar

1492 Posts
Member #: 9468
Post Whore

Wootton Bassett

Didnt get much done today as I went with my dad to pick up a rear axel

Heres todays progress:

Gear stick in:


Sealed and painted inner bulkhead box:


Gear linkage connect and lambda sensor in:


Plugs tie wrapped to the top gear linkage bar (the one that doesnt move):


Gear knob and gaiter on, lambda senor cable comes in through the gear linkage hole:

On 10th Mar, 2012 theoneeyedlizard said:

Hypothetically speaking, where would you stick your nozzle?


On 22nd Jun, 2012 apbellamy said:
my wife doesn't know what.head is never mind compression ratio.


mercenary62

User Avatar

641 Posts
Member #: 9937
Post Whore

somewhereintheuniverse near selkirk scotland

your doin a gr8 job mate ,not long now

give em hell


Craigie-B

User Avatar

1492 Posts
Member #: 9468
Post Whore

Wootton Bassett

Heres yesturdays progress:

So I ballsed up the carb throttle spindle the other day when tryign to make the carb and plenum fit, my dad had this idea that we would take the spacer out and then fit the carb and plenum on that way. My dad was dead set against using an adjustable engine steady as he was thinking about the extra strain on the bottom engine mounts, so we worked otu would have to move the accelerator bit round so it wouldnt hit the manifold anymore and the throttle spindle snapped as a result:

Snapped throttle spindle:


ShellSpeed sent me his old NA hif 44 so I could scavange the parts I need - Thanks mate :)


After an hour:


Ready to go back in the car *happy*

Got the adjustable steady on the car and it went on lovley! Now I had to just alter the bulkhead a small amount to clear the plenum as it was tapping it:


Woohoo :)

Got the plenum on:


Starting to look like a proper turbo mini now *happy*

Since APBellamy has his car on its wheels, I wanted mine on its wheels considering I have alot less work to do than him, in my eyes he was beating me sooooo I was determined to get it on all 4's, for the first time since April:

The steering rack was a complete pain in the arse, the nuts we put on finger tight so we wouldnt loose them had rusted up, long story short the nut had to be cut off and we found a new one and used that, we then got it all together and I went to turn the steering wheel and we found this:


So we had to strip it all down and sort out the ball joints:


Re-shimmed them and re-torqued them, they were way too tight I think.

Got it all back together:


Did the other side and took this video:


This is the worst out of all 4, ill see how it goes.

Then another problem occured, when we took the hubs apart one of the wheel bearings had rusted solid on the drive shaft, so my uncle brayed the hell out of it with a hammer, curved 3 of the threads so my neighbours daughters husband (who also has a mini) popped over to see his father in law (my neighbour) and thought he would come over say hi see how I was doing and got roped in haha. Managed to sort it out for me and then I could torque up the castle nuts and put the split pin in and get the wheels on!

Heres the piccies after a 12 hour shift on the car:

Straight after it was on its wheels:


Sat on the wing to compress the suspension a bit and get it to the proper ride height and also packed up all my tools and everything:


The left to do list:


So although I didnt get much done, I've come to a point where I have accepted that there will be problems with everything that goes on the car so I dont get quite so annoyed with it anymore :)

Cheers!

On 10th Mar, 2012 theoneeyedlizard said:

Hypothetically speaking, where would you stick your nozzle?


On 22nd Jun, 2012 apbellamy said:
my wife doesn't know what.head is never mind compression ratio.


tadge44

3004 Posts
Member #: 2500
Post Whore

Buckinghamshire

In the photo it looks as if you still need that bracket on the engine end of that steady.


wng691s clubby

User Avatar

2057 Posts
Member #: 9252
Post Whore

Cleethorpes

http://www.somerfordmini.co.uk/eshop/index...roducts_id=6721
before you cause more problems for your self than its worth

Done now needs redoing lol


jakejakejake1

User Avatar

293 Posts
Member #: 10010
Senior Member

Northants

Just to add, the front bolt of my engine steady came out without me knowing, and not long after the rear (the one you have) had sheared off. Save yourself the hassle and fit the bracket with two bolts! Although if it does shear you can always use the repair/ bodge bracket from minispares.

Jake


Craigie-B

User Avatar

1492 Posts
Member #: 9468
Post Whore

Wootton Bassett

I forgot to mention in the post above i have one on order, it hadnt turned up yet is all, will get it put on next week as im back in uni now! If you notice the bolt isnt in properly this is because im waiting for it to turn up *smiley*

Dont worry guys, I have paidmattention to what youve said and it will be going on as soon as it turns up

Edited by Craigie-B on 12th Aug, 2012.

On 10th Mar, 2012 theoneeyedlizard said:

Hypothetically speaking, where would you stick your nozzle?


On 22nd Jun, 2012 apbellamy said:
my wife doesn't know what.head is never mind compression ratio.


Craigie-B

User Avatar

1492 Posts
Member #: 9468
Post Whore

Wootton Bassett

Okay so I spent a week with my gf in Coventry as she was getting upset that I was leaving her alone all the time, came back friday night and started ont he mini on Sunday.

Got the steady bracket on:

Theres a gap?


Put some washers in *happy*


Got both the gearbox steadies from minispares with the poly bushes as well:


Beautiful *happy*

Next came to sort out the oil cooler, went to take off the old connections, were tight as hell and ended up shearing:


Going to leave the oil cooler off untill I come to do track days next year so will put one on then.

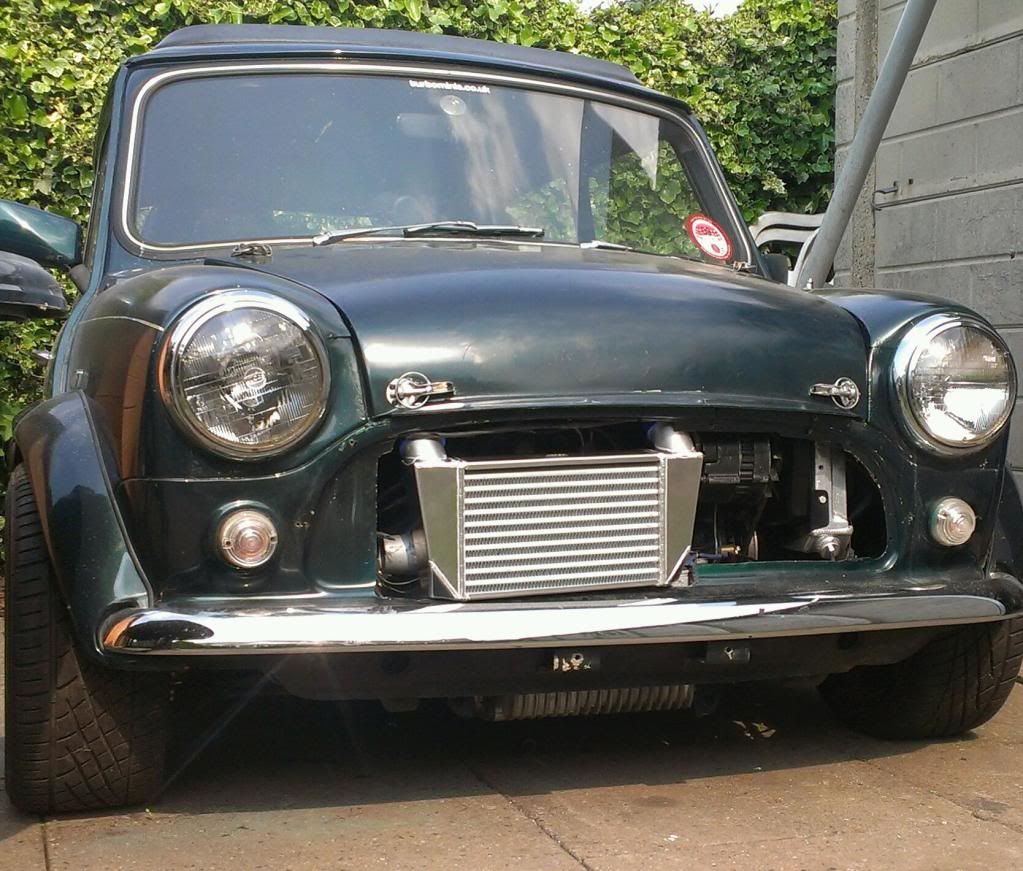
Went to figure out the Intercooler, I have a 20vt one and thoguth I'd side mount it here:


Like this:


Just couldnt get it to fit at all :( so that will be for sale soon and im going cossie 2wd like benny had.

That was Sunday,

Mondays work:

Didnt do too much because I helped my dad clear his garage out in the morning then did a little bit in the afternoon/evening:


The boss was watching:


Leccy fan and radiator in:


Can reach the connections to the fan switch through the grill


Cool!

Todays work:

Went to put the pipes onto the radiator and the bottom hose didnt seem to be the right size?


As you can see the red hose seemed to be the same size as the waterpump and that the black hose was so much bigger the red one fit inside of it.

Bit of washing up liquid and about 3 hours later I finally had this:


What a PITA, its on properly though and Is not loose at all - had to jiggle and rotate the bottom radiator part up to the top about 4 times, so I know its good:


Top hose needed modifying as well as the bottom hose, both were way too long:


Sandwich plate from Jameswildcooper FINALLY turned up after about 3/4 weeks of waiting (love you really mate *wink* ):


Had to modify that to make it fit as well? Would of thought being a m ini part it would of gone straight on, guess not!

Last but not least got the coil pack on, and the holes drilled for the EDIS. So tomorrow could possibly be a megajolt wiring in day :)


Loosing the motivation now though. Just pissing me off that everything needs modifying to fit - I mean surley it shouldnt be this hard to build a turbo mini? Just really getting fed up with everything taking 2/3 times as long as it should do because it doesnt fit right :(

I want it taxed MOT'd and road legal by 31st of August as its nearly there now and it shouldnt take me that much longer to get it all together and working (touches wood)

Thanks for reading :)

Edit: the updated TO-DO List:

Edited by Craigie-B on 21st Aug, 2012.

On 10th Mar, 2012 theoneeyedlizard said:

Hypothetically speaking, where would you stick your nozzle?


On 22nd Jun, 2012 apbellamy said:
my wife doesn't know what.head is never mind compression ratio.


tadge44

3004 Posts
Member #: 2500
Post Whore

Buckinghamshire

You are doing OK - just forget the deadline and keep plugging on.

Giving yourself a deadline just adds pressure and can make you rush or bodge just to see it running - but we all do it !


Craigie-B

User Avatar

1492 Posts
Member #: 9468
Post Whore

Wootton Bassett

yeah :) Car spaghetti today! If the parts arrive that I have ordered I can cross off the entire left hand side apart from exhaust and the guages :)

On 10th Mar, 2012 theoneeyedlizard said:

Hypothetically speaking, where would you stick your nozzle?


On 22nd Jun, 2012 apbellamy said:
my wife doesn't know what.head is never mind compression ratio.


Craigie-B

User Avatar

1492 Posts
Member #: 9468
Post Whore

Wootton Bassett

Okay so this past week I have worked 6 days straight on the car with about 10 - 12 hours a day on it, today I had a day off - like the good lord "on the 7th day he rested" *wink*

Anyhow I havent put any pictures up of me doing the wiring simply because there isnt really much to see! Heres the past 3 days (30 - 36 hours work *surprised* ) but all the wiring is done! apart from the loop connector for the stereo to go on the battery and tie wrapping the stereo wiring out the way.

I forgot to get a picture of the to-do list so will throw that up tomorrow as im in bed now but I really do feel like its possible to finish this car now. Its come a long way in the past 3 days.


If any part of this build I was not looking forward to/nervous about it was the wiring, however I took my time and my grandad showed me how to solder wires together properly so im sure we've done a good job :)

Heres the pics:

22nd:

Start of the day, mini looking like a storage container, idea was to strip it completley so that I can get the wiring done with no issues:


Stripped:


Look what I found while stripping it out:


LOL, I had a feeling I had one of these lying around. Nevermind ill paint it and chuck it up for sale none the less.

Time to mount megajolt, just happened to fit on the other side of the coilpack bolts, very conveinient:


Lovley!

Rest of the day was spent doing the EDIS loom and getting that to the right lengths, I also went and bought an aux fusebox so that I can use a 4 pin relay to make it an ignition live fusebox for all the extras im adding on the car. Check me out getting the hang of relays and wiring *wink*

Trial Fitted my fiesta HT leads, fit perfect! :


My turbo charged storage container end of 22nd:


23rd:

I spent most of my day double checking connections on the EDIS loom and also doing the Fuel pump loom, not much to see because there obv isnt really any piccies to take.

Finished EDIS loom and wrapped up:


Had to re-mount my aux fusebox as where I had it was going to be covered by the heater so chose to put it here and mount the relay and check connections finally:


Feeling like im getting it all at this point.

Then it was time to tackle the fuel pump wiring:


My fuel pump relay is as follows (I missed off the inline fuses and inertia switch in this diagram, but dont worry they are there):


I wired it differently to the standard metro turbo relay because I am using the megajolt as the earth switch instead. This works differently to the oil pressure switch in that it is earthed after the engine reaches 500rpm (in my case as thats what I set it to on the map) whereas the oil pressure switch earths when there is no oil pressure (when the engine is off) and when oil pressure gains it breaks the connection, therefore being the opposite way round to the megajolt earth connection so I had to swap the starter and ign lives round :) - getting the hang of this relay and wiring business now :)

Once I had gotten this in my head it was a case of connecting everything together, got the wiring about 90% done for it before it got dark so called it a night, leaving only the starter connection and inertia switch for the next day.

24th:

Today I was determined to finish all the wiring and have it all sorted so all I would have to worry about is plumbing the rest of the car and then re-building the interior and making it a car again instead of a turbo charged storage unit.

Got the EDIS all fitted and plugged in, got the rubber bung for the bulkhead sorted and put the wires through:


Trigger wheel sensor connected:


Megajolt all connected up:


Fusebox with all the connections (apart from the guages) on!


Taping the loom, finished aux fusebox relay:


Inertia switch on:


Clocks need re-mounting (was making connection for rev counter - White and black going to the brass pole is the signal wire on the standard 3 clocks if you need to know)


End of the 3 days of wiring and I have:
Fuel pump Relay finished, Fusebox wired in, megajolt wired in, 12v socket wired in, stereo wired in Starter motor wired in:


All i have left to do with the wiring is a loop connector for the stereo on the battery, tie up and tidy the stereo wiring, new battery terminals (positive one is split and I may aswell make them both match haha), boost and afr guages.

Thanks for reading guys, will get an updated to-do list photo tomorrow morning for you!

Edited by Craigie-B on 25th Aug, 2012.

On 10th Mar, 2012 theoneeyedlizard said:

Hypothetically speaking, where would you stick your nozzle?


On 22nd Jun, 2012 apbellamy said:
my wife doesn't know what.head is never mind compression ratio.


wng691s clubby

User Avatar

2057 Posts
Member #: 9252
Post Whore

Cleethorpes

not too sure but i thought the inertia switch had to be up right

Done now needs redoing lol

Home > Show Us Yours! > Craigie-B 1310cc t2 mini turbo project :) (updated 17/11/2012) Now MOT'd
Users viewing this thread: none. (+ 2 Guests) <- Prev   Next ->
To post messages you must be logged in!
Username: Password:
Page: